Showing posts with label Breakfast. Show all posts

5.08.2024

Easy 10 Minute Scones with 5 Pantry Staples and Whipping Cream

It's been a long time since I last posted, over 8 years ago to be exact. The world looks a lot different than when I last posted: a global pandemic, invention of ChatGPT, and the meteoric rise of my favorite artist Taylor Swift. The only one I could have foreseen would have been Taylor Swift as I have been a Swiftie since 2010.

Many things have also changed in my personal life: on the food allergy front, on the family front and on the health front. There is a lot to unpack, especially on the allergy front that I can't wait to share with you. Since my last post, my little man will soon turn 11, and not so little anymore. I am also blessed to have a little princess who recently turned 8. During the pandemic, I discovered a new passion for running and fitness and ran my first 10k in 56 minutes. Stay tuned for content on self care for food allergy parents.

In spite of all the changes, the heart of this blog will remain the same: I remain resolute in my advocacy for those with food allergies, and my inner frugalness wanting to constantly seek the best value for my time and money. 

As a mom of two who loves to overcommit to activities, my time is also limited and precious. I enjoy watching short videos and my goal is to create videos for some of my most popular recipes and share new recipes, life hacks and ways to you save time and money. I will be sharing content on my blog as well as filming YouTube videos and Instagram reels. Thank you for your patience as I learn and grow. 

Reader Survey: Leave me a comment below and let me know a little about you and what type of content interests you. Or head over to this 1 minute survey and let me know what type of content you want to see featured in the future. https://bit.ly/FAMReaderSurvey


I want to conclude my post with a quick recipe for scones using whipping cream. This King Arthur recipe uses only 6 ingredients, and whips up in 10 minutes if you use a food processor or 15 minutes if you don't. For those with food allergies, it is hard to find safe baked treats free of cross contamination. This is why I always resort to making my own and have come to rely on this particular recipe for scones that are quick to whip up, but tender, crumbly and slightly sweet. This recipe is low effort, budget friendly and perfect for Mother's Day celebrations, quick breakfasts on the go, or your next brunch or tea party! For those who are visual, check out my very first YouTube video.  


Ingredients
3 cups all purpose flour 
1 TBSP baking powder
1 tsp salt (I use sea salt)
1/4 cup granulated sugar
1 tsp vanilla extract
1-1/2 to 1-1/3 cups whipping cream plus extra for brushing on scones
Sugar for sprinkling 

Directions
1. Preheat oven to 425 degrees F.

2. Line a baking sheet with parchment paper or a silicone baking mat like Silpat. 

3. In a bowl or food processor, mix 3 cups of all purpose flour, 1 TBSP baking powder, 1 tsp salt and 1/4 cup granulated sugar. 

4. Mix 1 tsp of vanilla with 1-1/2 to 1-1/3 cups of whipping cream. Slowly mix into the dry ingredients until no traces of flour remain; the dough should not be sticky. Drizzle a tablespoon of whipping cream if the dough looks dry. Repeat as necessary.

5. Lightly flour a surface and dump out the dough. Using a rolling pin, roll the dough out to 3/4" thickness. With a biscuit cutter, or sharp knife, divide the dough into 12 (or baker's dozen 13) equal sized scones.

6. Brush with whipping cream, and sprinkle sugar on top.

7. Bake for 14 to 16 minutes in the preheated oven until golden brown. 

8. Remove from the oven and serve warm with jam, clotted cream or with a cup of tea.


1.09.2016

Savory Green Onion and Egg Pancakes

I have been sick most of December with a severe cold and persistent cough that kept me awake at night. The sleep deprivation was the worst, caused by the non stop cough which got worse at nighttime. The last time I was this sick must have been over 12 years ago.

My husband was a huge help during the 18 days I was sick. He helped take care of the little man after work, grocery shopped, shopped for Christmas presents, cleaned the house and missed his company Christmas party at an upscale restaurant to take care of us. I am so grateful for his help despite his demanding work schedule.

Given my lack of energy, we had soup and congee on rotation for most of our meals. I aimed for quick, easy and simple during those 18 days. After two weeks of soup and congee, we were all ready for a break. Even though I was sick, I would think dream of foods I could eat when I got slightly better: one of things I craved was prime rib, and the other is Chinese green onion and egg pancakes.

When I was young, I would beg my late grandmother to make this green onion and egg pancake on a regular basis. My grandmother would often indulge me as she took immense pleasure in feeding those she love. Even in her last year of life, she would stand over the stove and make all my favorite dishes every time I went home to visit. Since her death over 8 years ago, I have been trying to recreate some of the recipes she used to make as we never wrote down any of her recipes.

This recipe is incredibly easy to make, with only 5 ingredients that you likely already have on hand. I took a short cut and used my blender to combine all the ingredients but you can combine the ingredients by hand as well.


Ingredients
4 large eggs
1 cup all purpose flour
1-1/2 cups water
1 tsp salt
2 large stalks of green onion, chopped

Canola oil

Directions
1. In a bowl or blender, mix eggs, flour, water and salt. Once the batter is fully combined, stir in chopped green onions.

2. Add half a tablespoon of canola oil to a large skillet over medium heat. Once the skillet is fully heated, pour/ladle in a thin layer of batter. Cook until the surface of the pancake bubbles and the other side is light golden brown.


3. Flip the pancake and cook until the underside is light golden brown. Repeat with the remaining batter. Make sure to lightly coat the skillet with canola oil before ladling in batter each time. Serve as is or with hot sauce.


Source: Slightly adapted from Asia Dish 

9.03.2015

Weekday Banana Pancakes

On my blog, you will notice that there is a lack of breakfast recipes, for good reason. That's mainly because I am not a morning person. Paying attention in the morning is a challenging task for me, at least until I have had a cup or two of caffeine.

I made this recipe a few months ago and never got around to posting it. It all came about when my little man wanted pancakes on a weekday morning. Had this been on a weekend, I would have happily pawned him off to my husband. But since it was a weekday, I had to suck it up and cook up some pancakes, at 7 am. Explaining to a hungry toddler why I don't like mornings seemed like more work to me than making the pancakes.

Luckily for me, this recipe is fairly straightforward and did not require too many steps. As I was nursing my mug of tea, I mused to myself, "Hey, this is a pretty simple recipe. I could pull this off on a weekday morning."


Ingredients
1 cup all purpose flour
1 tbsp white sugar
2 tsp baking powder
1/4 tsp salt
1 egg
1 cup milk
1 tsp vanilla
2 tbsp vegetable oil
2 ripe bananas, mashed

Directions
1. In a large bowl, combine flour, white sugar, baking powder and salt.


2. In a separate bowl, mix together egg, milk, vanilla, vegetable oil and bananas.


3. Stir the liquid mixture into the dry mixture until the flour is just mixed in. Do not over mix.


4. Heat oil in a large pan over medium high heat.


5. Scoop 1/4 cup of the batter into the pan and cook the pancake until the pancake is bubbly on top.


6. Flip the pancake and cook for another minute or two until the pancake is golden brown.


Freeze/Make Ahead: Allow the banana pancakes to cool to room temperature before wrapping each stack of 5 pancakes in plastic wrap. Place the wrapped stacks of pancakes into a ziploc bag, date and freeze for up to a month.


Source: Allrecipes


8.17.2015

4 Ingredient Microwaved Gluten-Free Bread (Ready in 3 Minutes)

Baking bread in the oven is the last thing I want to do in the summer when it is hot and sunny outside. When I came across this microwaved bread recipe on Pinterest, I was delighted. The best part about this recipe is that it is ready in 3 minutes.

This recipe was incredibly easy to whip up and required only 4 ingredients: melted butter, coconut flour, egg and baking powder. After allowing the bread to cool down a little, I sliced the bread in half and spread a little raspberry jam on each slice of bread. My little man and I both loved this quick and easy microwaved bread as it was soft and fluffy. This bread reminded me of a dense and unsweetened sponge cake both in taste and texture.

For those with gluten allergies, this recipe is effortless, made to order and a delicious alternative to expensive store-bought specialty bread.


Ingredients
1 tbsp butter
1 large egg
1 tbsp coconut flour
1/4 tsp baking powder

Directions
1. Place 1 tablespoon of butter in a small microwavable bowl measuring 4.5 inches across (I used a small Pyrex glass container). Microwave for 10 to 20 seconds until melted. Swirl the melted butter around so that it coats the bowl.

2. To that same bowl, add the egg, coconut flour and baking powder. Mix thoroughly until the batter is smooth and no lumps remain.


3. Microwave on high for 90 seconds until the bread has puffed up and is firm to the touch. The bread will pull away from the bowl once it is cooked. Repeat in 15 second increments if the bread feels soft to the touch or sticks to the bowl.


4. Allow the bread to cool for a minute before loosening it with a knife. Invert the bowl and slice the bread in half. Serve with jam, honey, butter or your favorite seed butter!


Source: Slightly adapted from Healthy Recipes

7.15.2015

Healthy Banana Oatmeal Breakfast Cookies (Free of Top Allergens)

I am not a morning person. Never have been, and likely never will be.

My little man on the other hand, loves getting up early.

With an early riser in the family, nowadays I get up as early as 5 am. I have found that since I get up much earlier now, I like to have a light breakfast to tide me over until lunchtime.

I discovered this Healthy Banana Oatmeal Cookie recipe back in April and have made it countless times. This recipe is quick and easy to make, and can be kept in the fridge for up to a week (if it lasts that long).

For those with food allergies, this recipe is free of all the top allergens. I made my own apple sauce from scratch using this recipe and substituted honey in place of sugar to make these cookies even healthier. Did you know you can freeze homemade apple sauce?

These Healthy Banana Oatmeal cookies are a huge hit and a winner in our household as they are delicious, sugar free and good for you.

It makes me feel like a rebel when I tell my little man he can have a cookie at 5 am. Just don't tell him these cookies are healthy! ;)


Makes: 20 to 24 cookies

Ingredients
3 large ripe bananas
2 cups rolled oats (gluten-free or regular)
3/4 to 1 cup sugar free dried fruit (homemade or store bought; I used dried cranberries)
1/3 cup apple sauce (homemade or store bought)
1 tsp vanilla extract

Directions
1. Mash the bananas in a large bowl. Add in dried fruit, apple sauce and vanilla.


2. Mix well and allow the mixture to sit at room temperature for at least 15 minutes. Please do not skip this step as the oatmeal needs to soak up all the moisture to bind the ingredients together.


3. Preheat the oven to 350 degrees F.

4. Drop cookies by the teaspoonful onto a parchment lined baking sheet. With the back of a large teaspoon, flatten the cookie flat into a round shape.


5. Bake for 20 minutes or until lightly brown.

6. Transfer the cookies to a cooling rack and allow the cookies to cool for 10 minutes before eating. Store in a tight lidded container for up to a week in the fridge.


Source: Adapted from Allrecipes

5.03.2015

Banana Chocolate Chip Muffins (Kid-Friendly)

My little man got up this morning at 6:45 am instead of his usual 8 am wake up time. Needless to say, it took me by surprise.

With a hot cup of tea in my hand, I sat at the dining table contemplating what to do with a little one full of energy, at 7 am. I am so not a morning person. Yawn.

As I was watching my little man wolf down his cereal and yogurt, I asked my early riser if he wanted to make banana muffins or banana pancakes. With a sparkle in his eye, he clapped his hands and squealed "muff". Okay, muffins it is.

This was the first time my little man and I baked/cooked together. My goodness, I was super surprised by the fact that he is a seasoned pro (for a toddler!). This is all in part thanks to my husband who gets the little man's help on weekend mornings making pancakes. Check out the pictures below of my little man mixing, mashing and stirring the banana muffin batter. Hey, Chef Ramsey, my little man will be a MasterChef (Junior)!


Ingredients
1 cup all purpose flour
1/2 cup whole wheat flour
2 tbsp baking powder
1/2 tsp salt
3 medium, ripe bananas
3/4 cup light brown sugar, lightly packed
1 large egg
1/3 cup butter, melted
1/4 cup chocolate chips (you can add up to 1/2 cup if you want more chocolate chips)

Directions
1. Preheat the oven to 350 degrees F.

2. Combine all purpose flour, whole wheat flour, baking powder, and salt in a large bowl.


3. In another bowl, mash bananas with a fork or potato masher.

"Mas Mas Mas" (aka Mash Mash Mash)

4. Add in sugar, egg, butter to the banana mixture until it is thoroughly combined.


5. Mix the wet mixture into the dry mixture until it is just combined; do not over mix.

Mix Mix Mix.

6. Stir in the chocolate chips.

Mix Mix Mix some more.

7. Divide the batter evenly among 12 muffin cups (greased or lined with muffin liners).


8. Bake for 20 to 25 minutes or until the muffins are golden brown.


Source: Adapted from 201 Organic Baby and Toddler Meals

2.13.2015

5 Minute Bacon Egg McMuffin

In grade 8, as part of the school curriculum, we had to take home economics. The course included Textiles (sewing) and Food and Nutrition (Cooking). I was nervous since my only experience with either was observing my grandmother or my mom.

Luckily for me, my friend Melissa was also taking Food and Nutrition at the same time and became my partner. I was ecstatic as she regularly cooked dinners at home whereas I was an expert at boiling hot dogs. The course was fun for me as Melissa did most all the prep work and cooking. My contribution to the team was fetching ingredients, stirring sauces and washing all of the dishes. At the end of the course, we were rewarded with an A+.

Did I deserve the A+? I would say no, but it did make me more confident in the kitchen, even if it was stirring the sauce. The only recipe that I learned to make from Foods and Nutrition was this egg mcmuffin recipe, which I still make to this day.

The recipe is incredibly simple and comes together in less than 5 minutes. I stock English muffins and processed cheese in my freezer which helps to curb the urge to visit the golden arches. Not to mention, it is much cheaper too and no morning line ups! So the next time you are craving egg mcmuffins, take 5 minutes and make your own. Even the most culinary challenged can master this recipe.


Serves: 1

Ingredients
1 egg
1/2 tbsp butter
1 English muffin
1 slice of processed cheese
1 strip of bacon (optional)
Salt and pepper, to taste

Directions
1. Toast the English muffins in a toaster.

2. In a ramekin, melt butter on high in a microwave for 10 to 20 seconds.


3. Take the ramekin out of the microwave and swirl the butter so it coats the ramekin all around.

4. Crack an egg into the ramekin and season with salt and pepper. With a fork, poke the egg all over (this is to prevent a mini "egg"plosion). Cover the ramekin with a paper towel and microwave for 60 to 70 seconds. Remove.


5. Place 1 strip of bacon on a plate, cover with a paper towel. Microwave for 80 to 90 seconds.


6. Assemble egg mcmuffin by placing the egg on top of the English muffin. Top with bacon and processed cheese. Microwave for 10 seconds to melt the cheese.


Source: Frugal Allergy Mom

2.10.2015

Best Belgian Waffles

I have had an obsession with Belgian waffles for a long time now. So much so that when we traveled through Brussels on our trip to Europe 3 years ago, I dragged my husband everywhere to look for this delightful treat. Sadly, most of the places we went to were tourist traps and resulted in waffles that are sub-par to what I envisioned: a buttery and sweet waffle with a crispy exterior and a soft fluffy interior.

My mission for Belgian waffles was also thwarted by Belgian beer, moules frites (mussels and fries), and Belgian frites (crispy fries with a crazy amount of sauces to dip the frites in!). I guess I will have to go back to Belgium to seek out more authentic waffles and hopefully not get distracted!

As my regular readers know, I am not a morning person. Making breakfasts is not my thing unless it is relatively easy to execute. Most of this recipe is fool-proof, however, it requires you to pay a little attention when it comes to whipping the egg whites. But trust me when I say the result is worth getting up early for.

This is the waffle I was longing for when we went to Brussels. The waffle is buttery, sweet and crispy on the outside, and soft and fluffy on the inside. It is also slightly sweet so you could eat this waffle on its own, without any syrup.

Now, this is the type of waffle you dream of and obsess about.


Makes: 10 - 12 waffles

Ingredients
2 cups all-purpose flour
3/4 cup sugar (scant)
3-1/2 tsp baking powder
2 eggs, separated*
1-1/2 cups milk
1 cup butter, melted**
1 tsp vanilla extract

Top with fresh fruit (blueberries, strawberries - optional)

* Separating the eggs: Make sure to separate the egg yolk from the egg white carefully, ensuring the egg white is not contaminated with any egg yolk. Please read Wikihow's methods for separating an egg. I prefer separating the egg yolk by hand and placing the egg whites into a clean and dry bowl.

** The best way to melt butter without splatters or without overheating it is to defrost it in your microwave on the regular defrost setting (and not quick defrost).

Directions
1. In a large bowl, combine flour, sugar and baking powder. Mix well.


2. In a separate bowl, lightly beat the egg yolks. Add in milk, butter and vanilla and mix well.


3. Pour the wet ingredients into the dry ingredients until it is just combined. Make sure not to over mix.

4. In a stand mixer, beat egg whites on low until the egg whites are foamy.


5. Then beat on high until stiff peaks form. Please read the troubleshooting tips below if this is your first time beating egg whites.


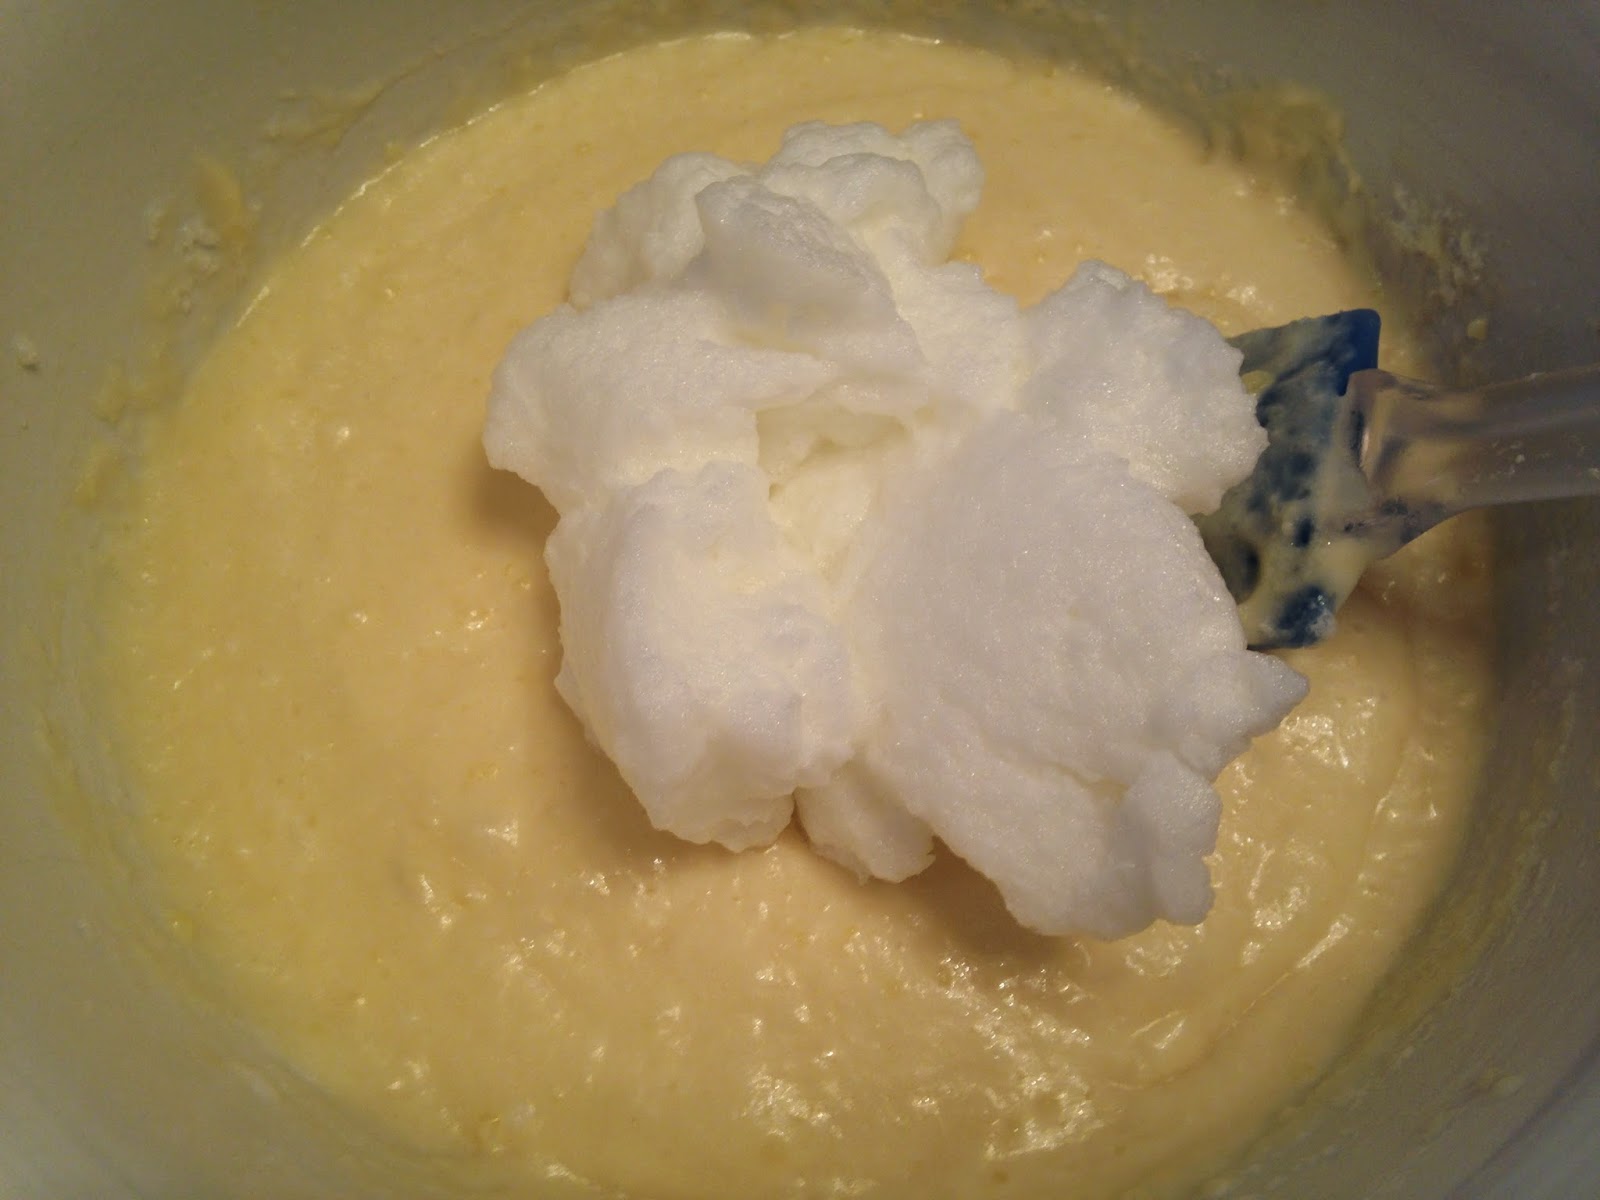
6. Fold in 1/2 of the egg whites into the batter, mixing thoroughly.


7. Add in the remaining egg whites, carefully fold the batter with a rubber spatula until just combined. Do not over mix!


8. Preheat a waffle iron according to manufacturer's directions. For my waffle iron, I use a scant 1/4 cup of batter (I used my muffin scoop) and cook for 10 minutes until the waffle is light golden brown.


9. Serve on its own, with fresh fruit or a light dusting of powdered sugar. Note: The waffle will appear quite soft when you take it out of the waffle maker but will crisp up after it cools. As my husband said, "Who in the world could wait that long?"


Source: Slightly adapted from Taste of Home

TIPS: Beating Egg Whites
  1. Make sure your utensils and bowls are clean and dry. Any residue of oil or water will prevent your egg whites from forming stiff peaks.
  2. Separate the egg yolk carefully from the egg white. The presence of the slightest bit of egg yolk will foil your plan for stiff peaks.

2.01.2015

How to Poach 12 Eggs at Once (Kitchen Hack)

Discovering new cooking hacks are one of my favorite things. That's why when I came across a method to poach 12 eggs at once this week, I decided that I must try this out ASAP. I first saw the tip from Food and Wine and then a few hours later from The Kitchn. You know it is a legitimate hack when it has been verified by two credible sources.


We love poached eggs and the easiest method I have found so far came from America's Test Kitchen to poach 4 eggs at once (I blogged about it here). We have been using the ATK method since last year but I have found it was difficult to poach eggs for a large crowd. If you have made eggs benedict for brunch, you know how time consuming it can be to poach eggs for a crowd.


We made eggs benedict for breakfast this morning using this tip. This tip is an easy, efficient and stress-free way to poach up to 12 eggs at once. Hakuna Matata.

The texture and taste is the same as pan poaching. The only difference is the eggs take on the shape of the muffin tins (which, if it is an issue, can be easily remedied by pouring the hollandaise sauce over the eggs). For those catering to guests who like their eggs differently, leave the eggs in the muffin tin for a few extra minutes for more well done eggs (take those out last).


Special Equipment: Muffin tin

Ingredients
Eggs
Cold Water

Directions
1. Preheat the oven to 350 degrees F.

2. Place 1 tablespoon of cold water into every muffin tin (even if not using to prevent the pan from burning).


3. Crack an egg into the muffin tin. I prefer The Kitchn's tip to crack the egg into a ramekin first (in case any shells fall in) and then pour the egg into the muffin tin.

Add a tablespoon of water to each muffin tin to prevent the pan from burning.

4. Bake for 11 minutes for soft runny yolk and 13 minutes for well-cooked yolk. Scoop the egg out of the muffin tin with a spoon. Note: The eggs will continue to cook a little more in the pan after you take it out of the oven.

Top off with homemade hollandaise sauce (recipe here)

Source: Food and Wine, The Kitchn

1.12.2015

BBQ Pulled Pork Breakfast Sandwich

I made a large batch of pulled pork to be eaten over the course of a few days. The day of, we had pulled pork sandwiches for dinner. The next day, I made pulled pork pizza. Day 3, we made these BBQ pulled pork breakfast sandwiches. And wow, was it ever good!

The pulled pork is topped with a slice of melted cheddar cheese, sunny side up egg and arugula. All of this was on top of a toasted bun spread with onion dip. The result was a sweet and savoury sandwich that melded together the sweetness of the pulled pork, the creamy egg yolk, peppery notes of arugula and hints of onions in a soft bun. Hungry yet?


Ingredients
4 eggs
1 tbsp vegetable oil
Salt and pepper to taste
1 cup pulled pork
4 slices of cheddar cheese
4 buns, split, lightly toasted
1 cup of arugula, washed and dried
Mayonnaise or onion dip

Directions
1. In a small frying pan over medium high heat, add vegetable oil. Pan-fry the eggs until the edges are crisp and cooked to your own preference; I like my eggs sunny side up. Season with salt and pepper to taste.


2. To the same frying pan, cook the pulled pork until it is heated through.


3. Spread the mayonnaise or onion dip over the top half of the bun.

4. Add 1/4 cup of the pulled pork and cheese to the bottom half of the bun. Toast in the oven or a toaster oven until the cheese is melted. Top with pan-fried egg and arugula. Serve with a side of vegetables.

Yum.

Source: Frugal Allergy Mom