Showing posts with label Crafts. Show all posts

4.11.2015

Free Monthly Kids Workshop at Home Depot (Canada & US)

At an early age, most toddlers recognize the corporate logos of McDonalds, Disney, Apple, Lego, Walmart and Starbucks. For my niece and nephew, they recognize the iconic orange logo of Home Depot long before they recognized McDonald's. (No joke!)


They recognize Home Depot's logo mostly because they have attended the free monthly Kids Workshop offered by the home improvement giant since they were toddlers. That and the fact their dad (my brother-in-law) is a regular customer.

When my brother-in-law heard that we were expecting, he reminded us to take our little one to the monthly Home Depot Kids Workshop. That made my husband (who is also a Home Depot regular) very happy.

This morning, we attended our very first Home Depot's Kids Workshop. Today, the workshop offered kids a chance to build a chalkboard planter stand.

This workshop was particularly popular!

The workshop was a great experience. Every child is provided with an authentic Home Depot apron, a commemorative pin and a building kit, which includes the instructions and all materials needed. Home Depot also provides all the tools to assemble and decorate the planter at designated tables, including hammers, paints, glue, paper towels and guidance (if the parents needed some help). Most of the items created from these workshops are practical items that can be used around the home and it is a great way to teach kids some useful life skills.

Ready to learn!

The workshop is geared towards 4 to 12 year olds, but we saw quite a few toddlers working away with their parents. Our little man is quite mature for his age, listens well and knows (for the most part) not to put small things (like nails) in his mouth. My husband enlisted the little man to "help" build and paint his planter.

Hammering away; just like his Little Tikes work bench at home.

After the planter has been built and painted, Home Depot gave each child a certificate of achievement. It was the perfect way to spend a bit of our morning at our little man's new favorite store. I have a strong feeling he will recognize the iconic orange signs before long!

The finished product!

TIPS
  • Go early to avoid crowds and avoid disappointment (as they can run out of kits). According to the friendly sales associate I spoke with, certain workshops are extremely popular: May (Mother's Day), December (Christmas).
  • Be courteous to staff and other participants. Please do not hog more resources than what you need.
  • Stay safe. Watch younger children as there are lots of small parts.
  • Say thanks to the friendly staff who run these workshops!


Home Depot Canada Home Depot United States
When
Second Saturday of each month
10am - 12pm*

First Saturday of each month
9am - 12pm*
RSVP Register online Register online
Cost Free Free
Ages 4 to 12 years old 5 to 12 years old

* Please call your local Home Depot before attending the workshop. While supplies last.

Reader Survey: Leave me a comment below and let me know a little about you and what type of content interests you. Or head over to this 1 minute survey and let me know what type of content you want to see featured in the future. https://bit.ly/FAMReaderSurvey

2.12.2015

DIY 5 Minute Valentine's Card Ideas: Lion Heart & Love Bunny

February 14th is two days away and most of the men I know are scrambling trying to find the perfect gift. Personally, I think we should show our loved ones how much we love them every day of the year; not only on Valentines Day. Valentine's Day also does not have to be on an expensive and extravagant affair. Sometimes, the best things are made with love.


My little man and I went to Storytime at the library this morning. Miss Tina, our librarian, read "My Heart is Like a Zoo". I loved the heart shaped animals so much that I came home and turned them into Valentine's cards.

This is an easy DIY you can do with your kids and only took me 5 minutes to make one card. All you need are some materials that most of you (with kids) would have lying around the house.

This is a perfect personalized card for Valentine's Day, made from the heart with love.

Materials
Construction paper
Pencil
Black and red marker (i.e. Sharpie)
Scissors
Glue stick


Directions
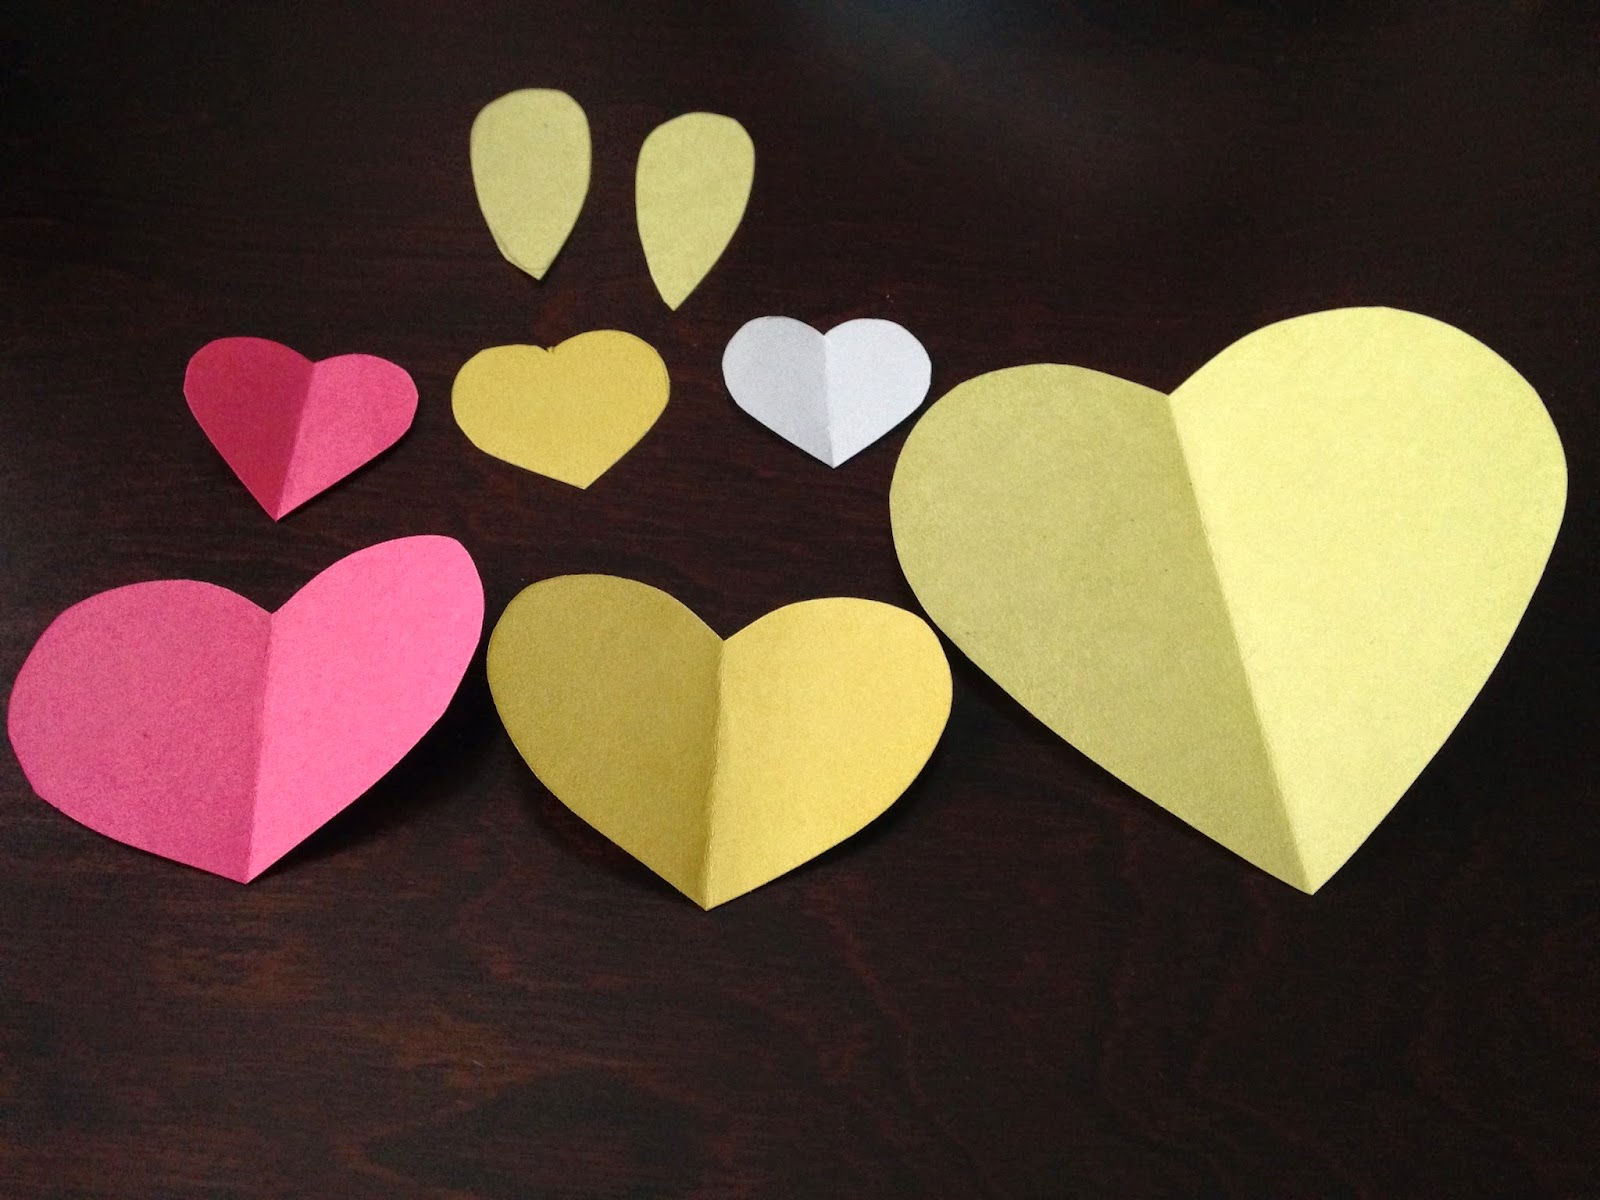
1. Draw different sized heart shapes on the construction paper. Cut out with scissors. Glue the pieces together and draw on the eyes (and nose for the bunny).

Lion Heart
It takes 4 hearts make this Prince Lion Heart.

For your "mane" valentine.

Love Bunny
It takes 6 hearts and 2 ears make this Love Bunny.

Love bunny (front).

Love bunny (back).

Source: Designs inspired by My Heart is Like a Zoo

Disclosure: This post contains affiliate links.

12.31.2014

Top 10 Posts of 2014

Exactly a year ago, 2013 ended off with a bang. Literally.

My husband and I were celebrating New Years at my Mother-In-Law's when the cork from a sparkling apple juice popped off unexpectedly. The cork hit a light bulb (in the ceiling fan), which shattered into a million pieces all over the living room. All of this happened minutes before the New Year's countdown.

We spent the last 5 minutes of 2013 frantically cleaning, vacuuming and sweeping the living room before counting down to 2014. It was not a relaxed way to celebrate the start the year.

2014 felt equally frantic as it was an eventful year for us (both good and bad). Through all the craziness, it made me realize the important things in life are being healthy and spending quality time with family.

Needless to say, I am hoping for a more relaxed way to end 2014 and hoping 2015 will be a healthier and happier year.

On behalf of my husband, myself and my little man, we would like to make a toast. We wish you and your loved ones a healthy and happy year ahead. Cheers!


And what better way to start 2015 than to try out the top 10 most popular posts on Frugal Allergy Mom.


Need caffeine? Try this recipe for delicious Vietnamese iced coffee.


Top waffles, pancakes, ice cream, turkey and chicken with this versatile Cranberry Blueberry Sauce.


Reuse wrapping paper to make this festive 3D Christmas Tree.


From start to finish, this pizza only takes 35 minutes to make.


A hearty soup to warm you up on a cold winter day.


A quick 20 minute cookie recipe to make when guests pop over unexpectedly!


An easy dessert to impress your guests.


Guaranteed perfect prime rib every time.


Rich and decadent hot chocolate that will curb your chocolate craving. Also great after a day out in the snow.


Fresh homemade bread loaf ready in over an hour!

Please come back and visit in 2015 for more nut-free recipes, frugal tips, allergy management and child development posts.

Happy New Year!

12.24.2014

DIY Paper Christmas Tree Ornament


I love quick and easy Do-It-Yourself projects. This Pinterest project for an origami folded Christmas tree takes less than 10 minutes. It is an easy project for kids, adds a festive touch to your Christmas dinner table and best of all, you can reuse wrapping paper (destined for the trash) from all those Christmas gifts.

If you make this Christmas tree, please send me a tweet @frugalnutfree and let me know how it turned out!

What You Will Need
Wrapping paper, origami paper or printer paper (preferably colorful and thinner paper stock)
Scissors

Video Instructions
I made a video showing how to make a paper Christmas tree in case the step by step instructions below are unclear. This is my first video, so you will have to forgive any little issues. :)


Step By Step Instructions
1. Fold a square piece of paper diagonally. Unfold the paper.


2. Fold the paper diagonally so the creases form an X. Unfold the paper.


3. Fold the paper in half so it is a rectangle.


4. Fold the paper once again so it is a square.


5. Unfold the paper and flip it so the inside of the paper is facing up.


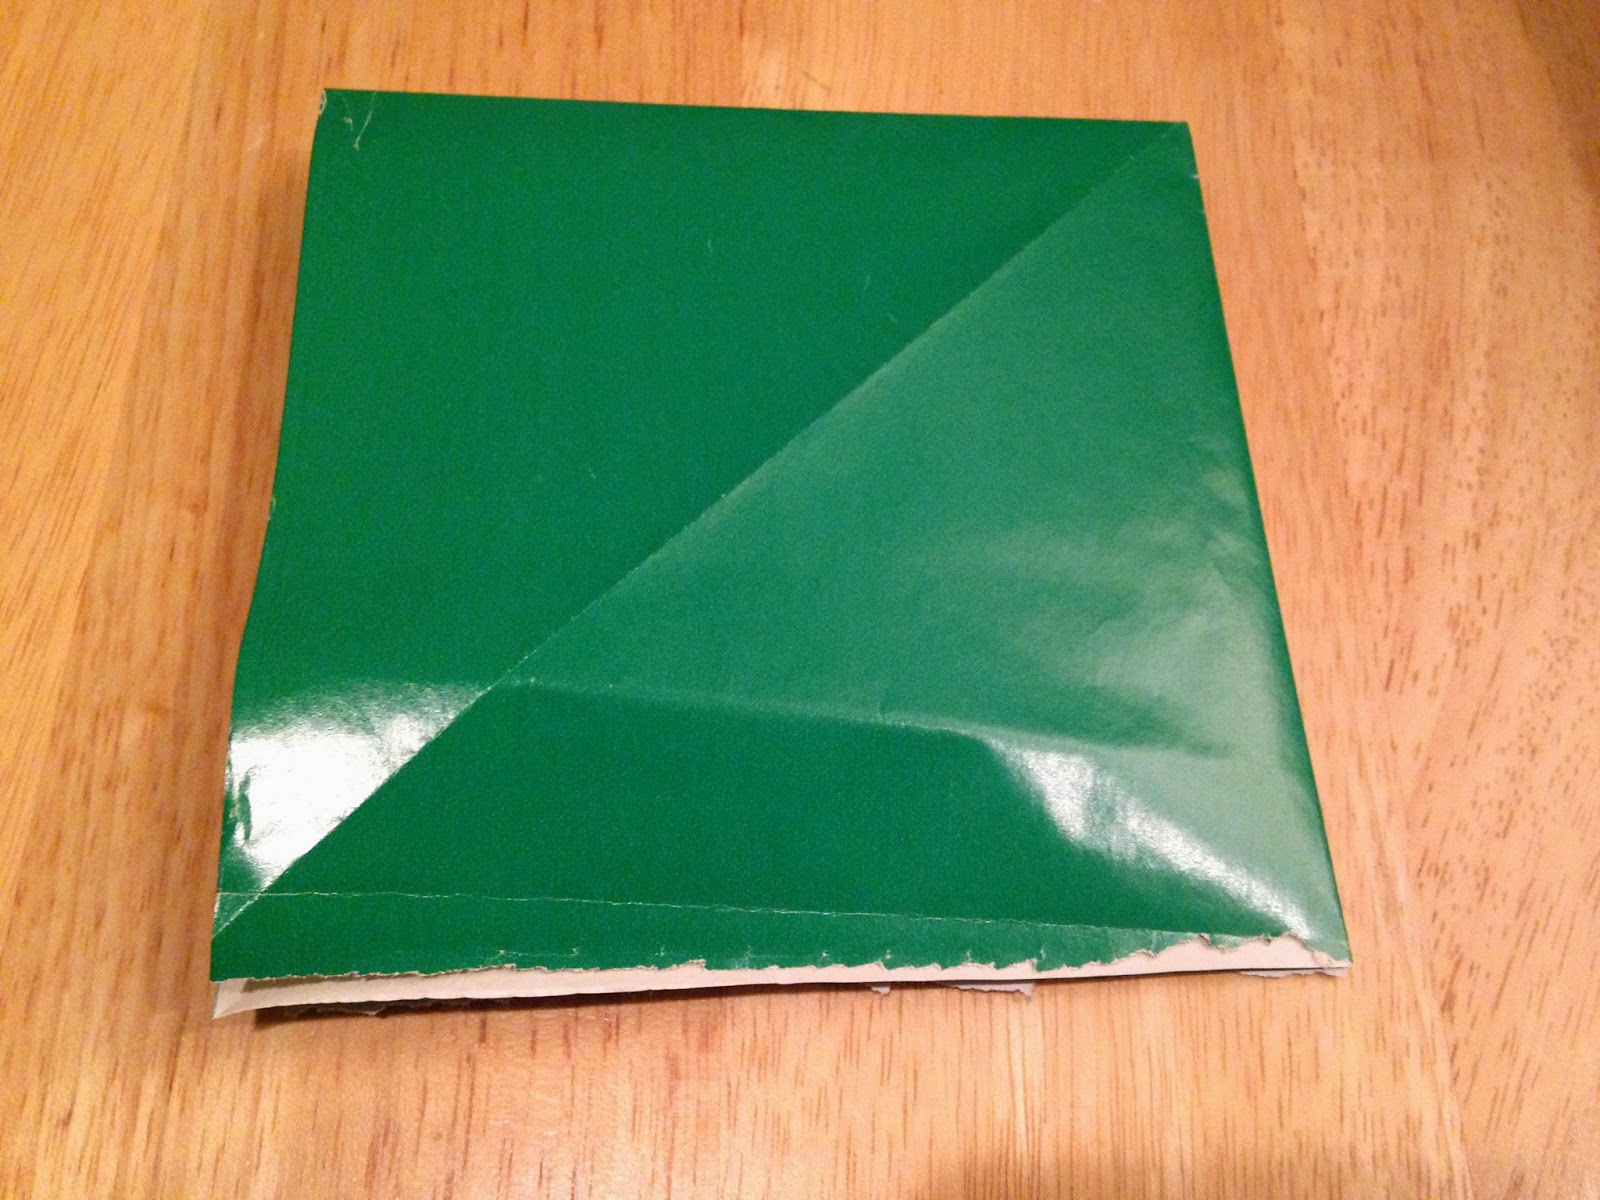
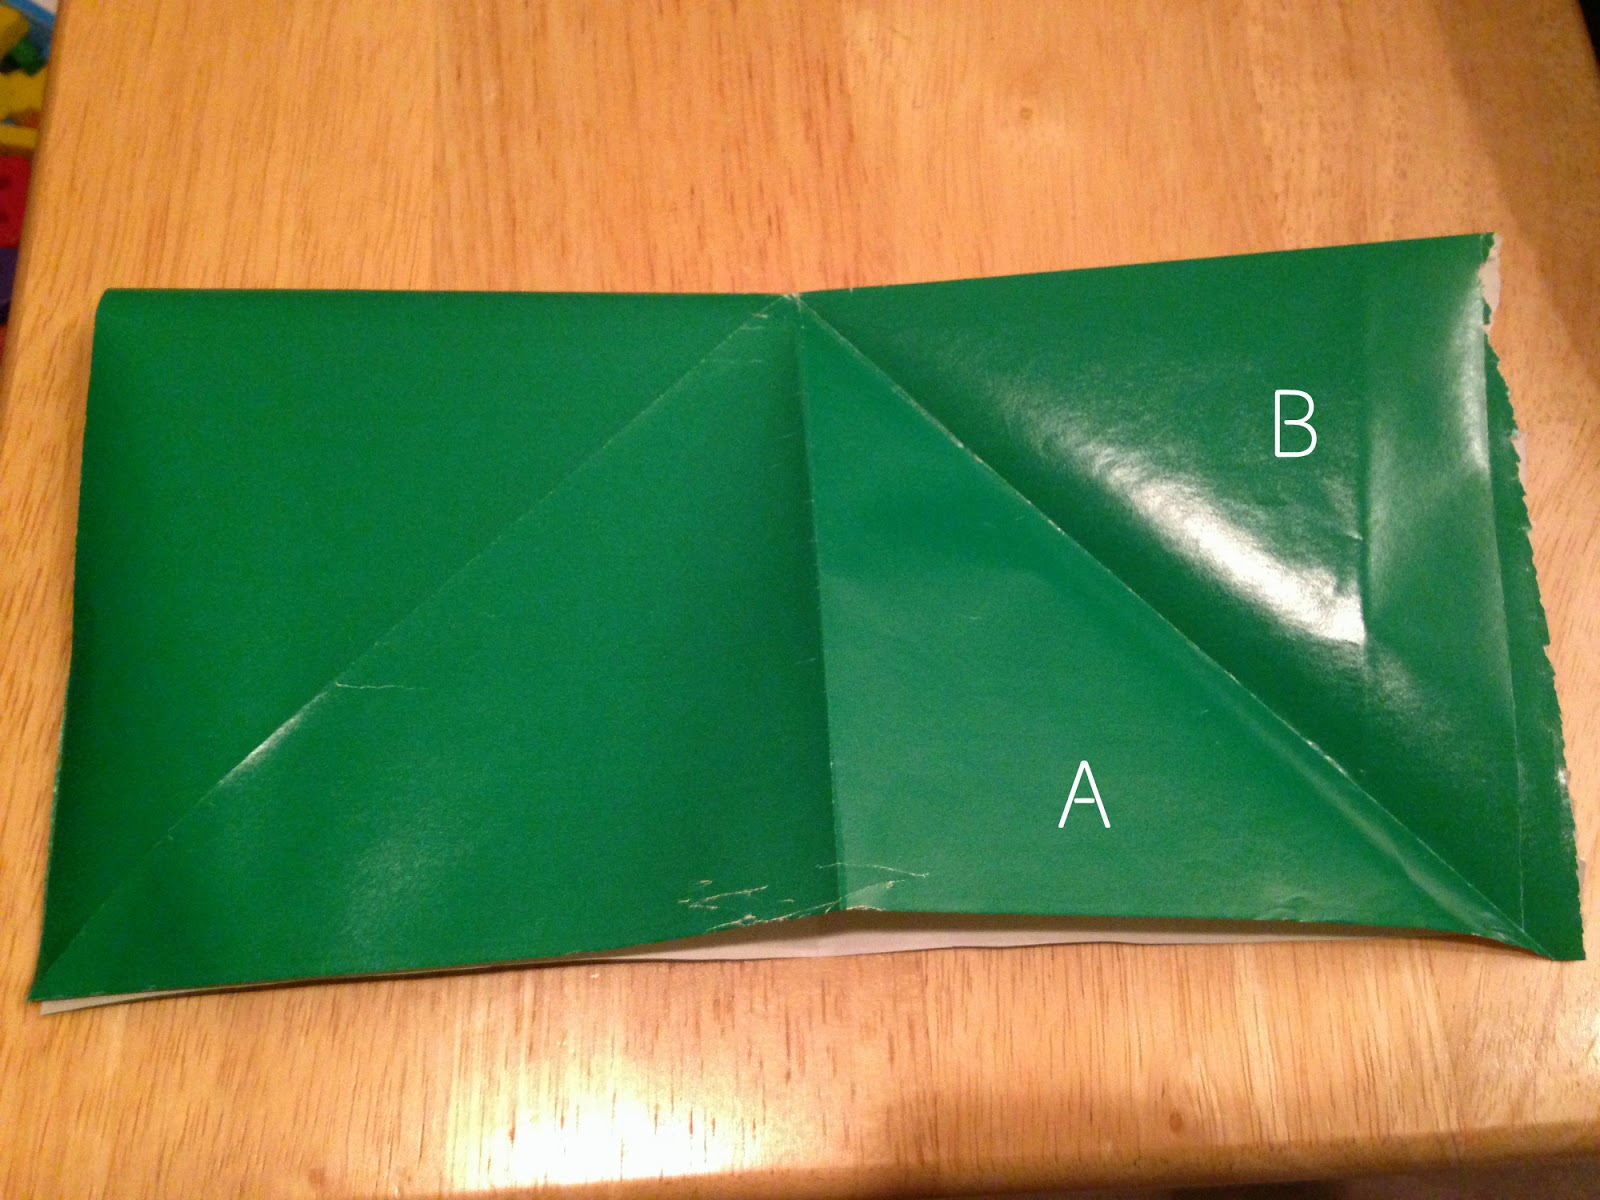
6. Fold the paper in half again. Fold A up to B while holding the bottom piece down and crease so it looks like the picture below. (Jump to 1:20 on the video)


7. Lift D and C fold in C so it looks like the picture below. (Jump to 1:25 on the video to see how it is done)


8. Turn the paper so the open side is closest to you.


 9. Fold the corners so it meets the line in the middle.


10. Repeat on the other side.


11. Unfold one side and tuck the corner in so it resembles a diamond shape. Repeat for the other three sides. (Jump to 2:35 on the video)


12. Trim the bottom of the diamond with scissors so it forms an (isosceles) triangle. Note: adults, please supervise younger children when using scissors.


13. Make 5 or 6 equal cuts on each side, cutting through all the layers. Make sure the cut is not too close to the center line.


14. Fold the sides in so it resembles a tree.


15. Fluff out so the sections are evenly spaced. Decorate your Christmas dinner table!


Source: Krokokat via Pinterest

8.12.2014

Felt Stories: The Very Hungry Caterpillar


Before I became a parent, I have never heard of Eric Carle, or known about his millions of adoring fans. Over and over, I kept hearing about how fantastic his books are, in particular, "Brown Bear, Brown Bear" and "The Very Hungry Caterpillar". Around the time my son was around 10 months old, I finally went to the library and borrowed The Very Hungry Caterpillar.


Cue my adoration for Eric Carle.

The Very Hungry Caterpillar and all the fruits he ate

The vibrant characters in his stories, the rhythmic words and the simplicity he uses to teach fundamental skills to young children are a few of the reasons why myself and many others love his books. Rightfully so, his books have been around since 1965 and The Very Hungry Caterpillar has been around since 1969. Where have I been?

Yes, I have become one of THOSE Eric Carle fans. Then I recalled seeing a felt board story at Strong Start (a program for children aged birth to five in a school-based environment which includes stories, music and art) and loved the interactive aspect of the felt story board. What better way to tell stories than with a felt board?

The sun, the moon, the leaf and the cocoon

I was still fairly new to Pinterest (more about my addiction to Pinterest later) when I stumbled upon Stephanie of Imagine Our Life's pin for The Very Hungry Caterpillar. She has very graciously provided the template to create your own The Very Hungry Caterpillar felt story. If you would like the PDF template, please follow this link to her page and leave a comment on her blog's comment form with your email address. She will email you the PDF template within a few days. Please note that she has generously donated her own PDF outline, therefore, please enjoy it for your own personal use.

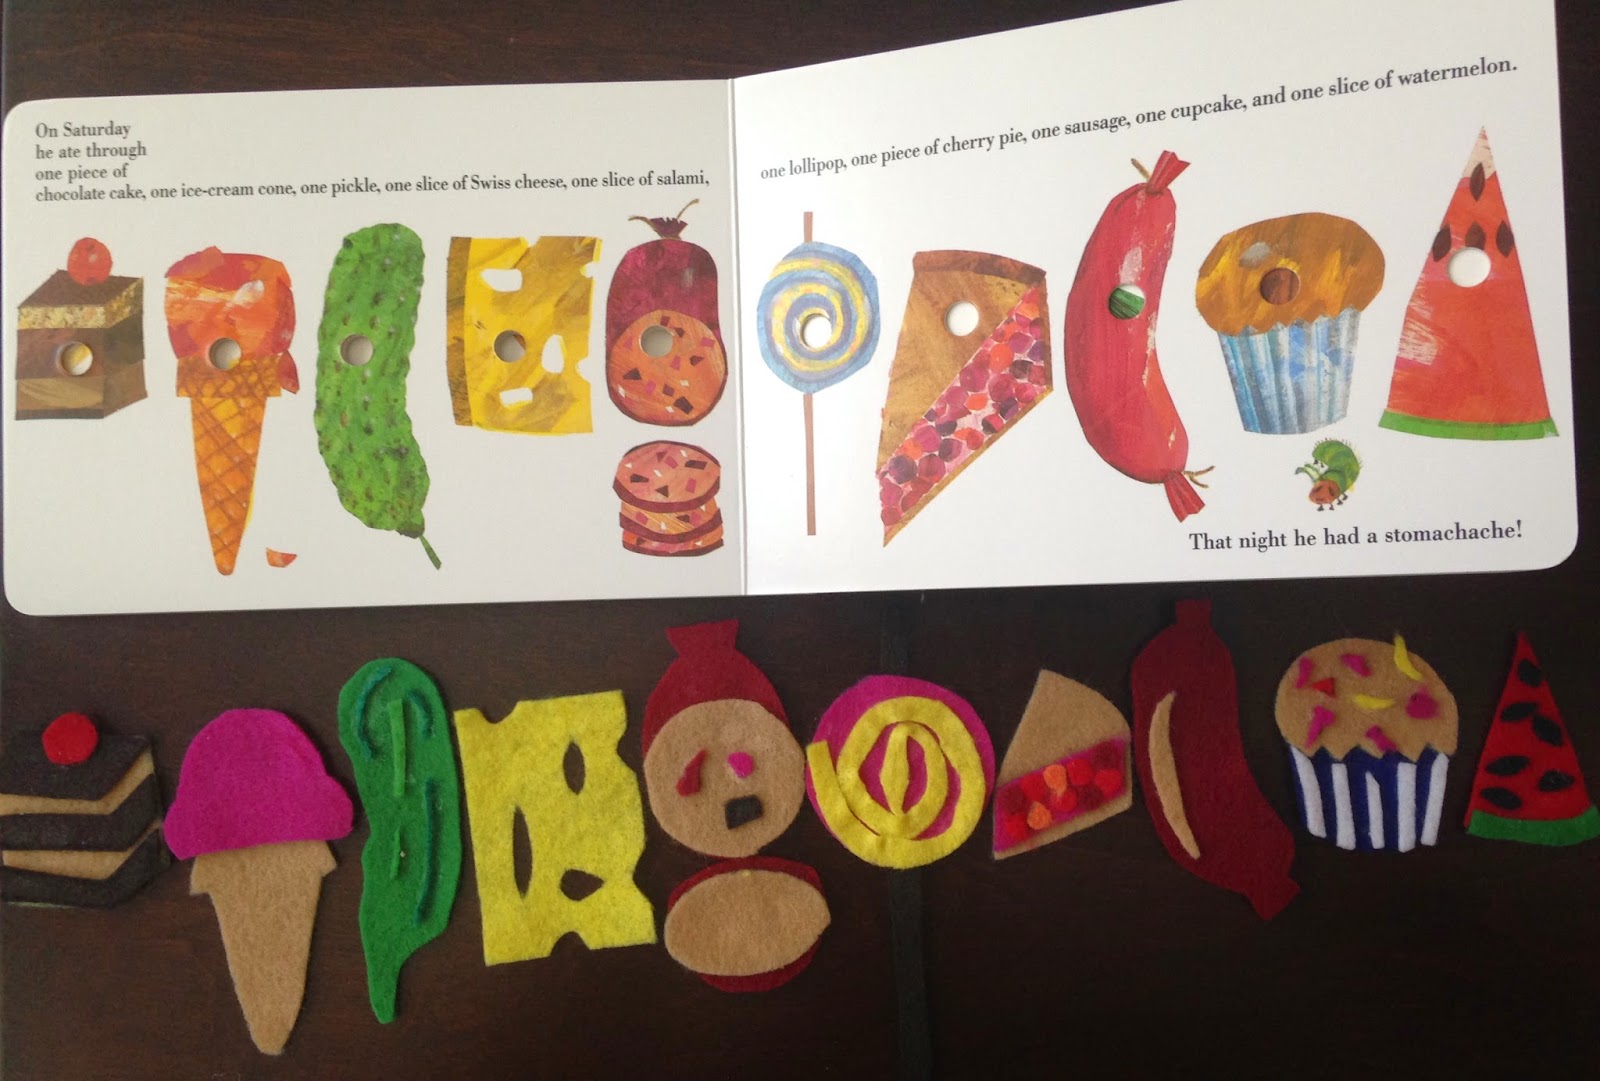
On Saturday, The Very Hungry Caterpillar ate all of this!
Based on her template, I sketched my design onto the back of cereal boxes, labelled each piece, cut them out and traced the cardboard templates onto felt. Then I cut out each piece of felt and glued them together using craft glue and a glue gun (for the more stubborn pieces that would not hold together). I omitted the embroidery that you see in Stephanie's felt story. One step at a time for this (not so) young grasshopper.

The beauty of Stephanie's template is that it broke down a very complex task into easy manageable steps for the felt board newbie and each outline is color coded so you know which color of felt fabric you need to buy.

Caterpillar template
Butterfly template

Food template

The result? My son and I both love it! We've read the book many times and have used the felt story board to bring the story to life. After reading this story many times, I realized why I love The Very Hungry Caterpillar so much; he and I share a passion for eating!


And he became a beautiful butterfly!

TIPS: 
  • Buying felt: Compare prices between fabric stores, department stores and dollar stores. The ones at the dollar stores and department stores (ie. Walmart) are pre-cut to 8.5 x 11 versus the random sizes (usually 6 x 6) you would get at the fabric stores. The fabric stores carry a better selection of unique colors, however, it is a hit or miss. I have purchased felt fabric as low as $0.33/each (for 8.5" x 11") up to $0.50/each (for 6" x 6").
  • Cutting felt: Use fabric scissors (aka scissors dedicated to cutting fabric only). This is because the paper fibers dull the scissors. I bought my scissors for $1.50 at the dollar store.
  • Glue: I used a craft glue from the dollar store for $1.50 which is suitable for fabric. Because of the many layers of felt that are glued together for the butterfly, you should consider either using a glue gun or use embroidery floss to sew all the pieces together.

Disclosure: This post contains affiliate links.