Showing posts with label Free of Top Allergens. Show all posts

12.05.2015

Sloppy Joes

Meals at dinner time can become repetitive for most families, mine especially. We have our usual favorites: Parmesan Crusted Sole Fillets, Hellmann's Parmesan ChickenFried Rice, Chow Mein, pasta, homemade hamburgers and pizzas.

Hamburgers were on the dinner rotation until I decided to switch it up and make sloppy joes instead.  Believe it or not, until I made this recipe, I have never had sloppy joes! I had no idea what I was missing out on.

This recipe was a hit with all of us, especially my little man, who loves ketchup or any foods with lots of ketchup. Saucy, hearty and filling, this recipe is sure to please even your pickiest eaters. I served the sloppy joes on a toasted hamburger bun with a salad on the side. You can also serve it with roasted potato wedges if you are feeling rebellious.

Ingredients
1 lb lean ground beef
1/3 cup chopped onion
1 - 1-1/4 cup chopped bell peppers (I used yellow and orange bell peppers)
1/2 tsp garlic powder
1 tsp prepared yellow mustard

3/4 to 1 cup ketchup
1-1/2 tsp brown sugar
Salt and pepper to taste

4 to 6 Hamburger buns


Directions
1. In a medium non stick pan, brown the ground beef over medium heat. Drain off any liquids and fat. Add in onion, bell peppers and cook until the onions and peppers are soft.


2. Add in garlic powder, mustard, ketchup and brown sugar. Mix thoroughly. Reduce heat to low and simmer for 20 minutes. Season with additional salt and pepper.


Source: Slightly adapted from Allrecipes

11.07.2015

Sweet Corn and Black Bean Salad

This is the salad that I have been eating all summer long. Well, ever since I discovered it at my Sister-In-Law's house back in June.

My Sister-In-Law always serves at least two amazing salads at her dinner parties. The list of salads on her menu rotate as she experiments with different recipes. This leads me to constantly asking her for recipes and helping myself to countless servings shamelessly as a dinner guest. My worst offense has been with this particular salad, where I was responsible for eating most if not all of it. If I recall correctly, other people wanted a second serving as well. Well, first come first served.

Since I couldn't get enough of this salad at my Sister-In-Law's, I had to make it for myself many times to satiate those pesky cravings.

This salad taste best when you use fresh, in season corn and tomatoes. Serve this salad as a side or a main entree, as it's guaranteed to please even the fussiest eaters. I hope your guests will be a little more considerate than I was at sharing.

Ingredients
2 corn off the cob (check out how to cook corn in 3 minutes) or 12 oz (360 ml) can of peaches and cream corn, rinsed and drained
3 vine-ripened tomatoes, diced into small pieces
12 oz (360 ml) can black beans, rinsed and drained
1/4 cup finely minced red onion
1/8 cup chopped cilantro (optional)

1 large avocado, peeled, pitted and chopped into bite sized pieces

Dressing
1/4 cup fresh lime juice
2 tbsp vegetable oil
1 tsp ground cumin*
1/2 tsp sea salt
1/2 tsp freshly ground pepper

Directions
1. Combine corn kernels, tomatoes, black beans, red onion and cilantro in a bowl.


2. Mix the ingredients for the dressing in a small bowl. Pour the dressing into the vegetables and mix. Allow the salad to marinate for at least 30 minutes to 1 hour in the refrigerator for best flavor. Stir in the avocado right before serving.


*For those with peanut and/or tree nut allergies, Clubhouse/McCormick sells spices free of peanuts and tree nuts. This may change without notice, please check with company for up to date information and always read all labels carefully before consuming.

Source: Lola via Frugal Allergy Mom

7.15.2015

Healthy Banana Oatmeal Breakfast Cookies (Free of Top Allergens)

I am not a morning person. Never have been, and likely never will be.

My little man on the other hand, loves getting up early.

With an early riser in the family, nowadays I get up as early as 5 am. I have found that since I get up much earlier now, I like to have a light breakfast to tide me over until lunchtime.

I discovered this Healthy Banana Oatmeal Cookie recipe back in April and have made it countless times. This recipe is quick and easy to make, and can be kept in the fridge for up to a week (if it lasts that long).

For those with food allergies, this recipe is free of all the top allergens. I made my own apple sauce from scratch using this recipe and substituted honey in place of sugar to make these cookies even healthier. Did you know you can freeze homemade apple sauce?

These Healthy Banana Oatmeal cookies are a huge hit and a winner in our household as they are delicious, sugar free and good for you.

It makes me feel like a rebel when I tell my little man he can have a cookie at 5 am. Just don't tell him these cookies are healthy! ;)


Makes: 20 to 24 cookies

Ingredients
3 large ripe bananas
2 cups rolled oats (gluten-free or regular)
3/4 to 1 cup sugar free dried fruit (homemade or store bought; I used dried cranberries)
1/3 cup apple sauce (homemade or store bought)
1 tsp vanilla extract

Directions
1. Mash the bananas in a large bowl. Add in dried fruit, apple sauce and vanilla.


2. Mix well and allow the mixture to sit at room temperature for at least 15 minutes. Please do not skip this step as the oatmeal needs to soak up all the moisture to bind the ingredients together.


3. Preheat the oven to 350 degrees F.

4. Drop cookies by the teaspoonful onto a parchment lined baking sheet. With the back of a large teaspoon, flatten the cookie flat into a round shape.


5. Bake for 20 minutes or until lightly brown.

6. Transfer the cookies to a cooling rack and allow the cookies to cool for 10 minutes before eating. Store in a tight lidded container for up to a week in the fridge.


Source: Adapted from Allrecipes

4.18.2015

No Bake Nut-Free Granola Bars

The food industry has come a long way for food allergy families. Years ago, I have never seen the peanut-free label anywhere; let alone on granola and chocolate bars. Nowadays, peanut-free snacks are on most store shelves.

When my little man was first diagnosed with peanut and almond allergies, I mistook peanut-free for nut-free until I came across an article which pointed out the flaw in my rationale. Nowadays, even when I see the peanut-free symbol, I make sure to read the ingredients carefully as tree nuts are sometimes in peanut-free snacks. This makes sense since peanuts and tree nuts are two very different things.

Without wanting to shell out a small fortune for allergy friendly granola bars, I decided to make my own and adapt a recipe I had found online. The granola bars I made are just as delicious as the store bought ones and comes together quickly with very little hands on work. Just a fair warning, these granola bars are very sweet especially when you add in the chocolate chips.  Next time I will substitute in some sunflower seeds in lieu of the chocolate chips. Because sunflower seeds are yummy.


Ingredients
2-1/2 cups Rice Krispies (or rice puffs)
2 cups quick oats (or 1-3/4 cup quick oats with 1/4 ground flax, hemp seeds or wheat germ)
1/2 cup dried fruit or seeds (I used Craisins which are nut-free and gluten-free)
1/2 cup honey
1/2 cup brown sugar
1/4 tsp salt
2/3 cup seed butter
1 tsp vanilla extract
1/2 cup chocolate chips (can substitute Craisins or seeds if you prefer a less sweet granola bar)

Directions

1. Add Rice Krispies, quick oats and dried fruit/seeds in a large container. Mix until combined.


2. In a small saucepan over medium-low heat, stir the honey, brown sugar and salt until it comes to a boil for 30 to 60 seconds.


3. Remove the saucepan from heat and stir in the seed butter and vanilla until smooth.


4. Pour the liquid mixture over the dry ingredients and mix well.


5. Allow the mixture to cool for 10 minutes before mixing in the chocolate chips. (If you mix it in too early, the chocolate chips will melt.)


6. Pour the mixture into a greased 9 x 13 pan, and press firmly with your hands to compact the granola bars. Cover the granola bars with plastic wrap and use a book to weigh it down. Allow the granola bars to set until it is fully cooled. Cut into 16 bars and wrap each granola bar individually. Store the granola bars on the counter top for up to 3 days and freeze the rest.


Source: Slightly adapted from Money Saving Mom

4.16.2015

Oven Baked Parsnip Fries

A couple of weeks ago, I came across parsnips while shopping at Sunrise Market. At $0.19 a pound, I was curious enough to buy a few parsnips to make parsnip fries.

I have had parsnip at various restaurants before, but I have never made them at home. As I was peeling the parsnips, I realized how similar parsnips and carrots are, in terms of smell, texture and looks.

I served my parsnip fries as a side to homemade salmon burgers. To quote Tony the Tiger, they are "grrrr-reat!"


Ingredients
2-1/2 pounds parsnips, peeled and cut into 3 x 1/2" sticks
1/2 tbsp dried rosemary (or 1 tbsp fresh)
1 large garlic clove, finely minced
3 tbsp olive oil
1/4 tsp cumin powder
Sea salt and pepper to taste

Directions
1. Preheat oven to 450 degrees F.

2. Toss parsnips, rosemary, garlic and oil in a bowl. Season with salt and pepper.


3. Spread out the parsnip in a single layer on a large rimmed baking sheet lined with parchment paper.


4. Bake for 10 minutes and flip the parsnip to cook the other side. Bake for another 10 to 15 minutes. Sprinkle with 1/4 tsp of ground cumin and toss to coat.


Source: Slightly adapted from Epicurious

2.25.2015

Crockpot Congee

In the week leading up to Chinese New Year, my little man came down with a runny nose and cough. I felt so bad for him.

When my little man is sick, all he wants is someone to cuddle and hold him. I love cuddling and holding him but it presents some challenges, especially when I am home alone with him. While cleaning can always wait when my little man is sick, we still need to eat.

This is where the crockpot comes in.

You put the rice, frozen (or fresh) chicken breast and water in the crockpot. Turn it on and go cuddle and hold your sick little ones (or whatever else you have going on).

In about 4 to 6 hours, the congee will be ready. It's perfect for those days when you have your hands full.

Just what Dr. Mom ordered.

Ingredients
1-1/4 cup white rice
10 cups water
1 large chicken breast, fresh or frozen

Directions
1. Wash rice until the water runs clear.

2. Add rice, water and chicken breast into the crockpot.


3. Turn to low and cook for 4 to 6 hours until the rice breaks down.

4. Take the chicken out and shred with two forks. Return the shredded chicken back to the crockpot.


5. Stir the chicken in. Serve hot.

Add some soy sauce and pickled vegetables, mmm mmm good!

2.21.2015

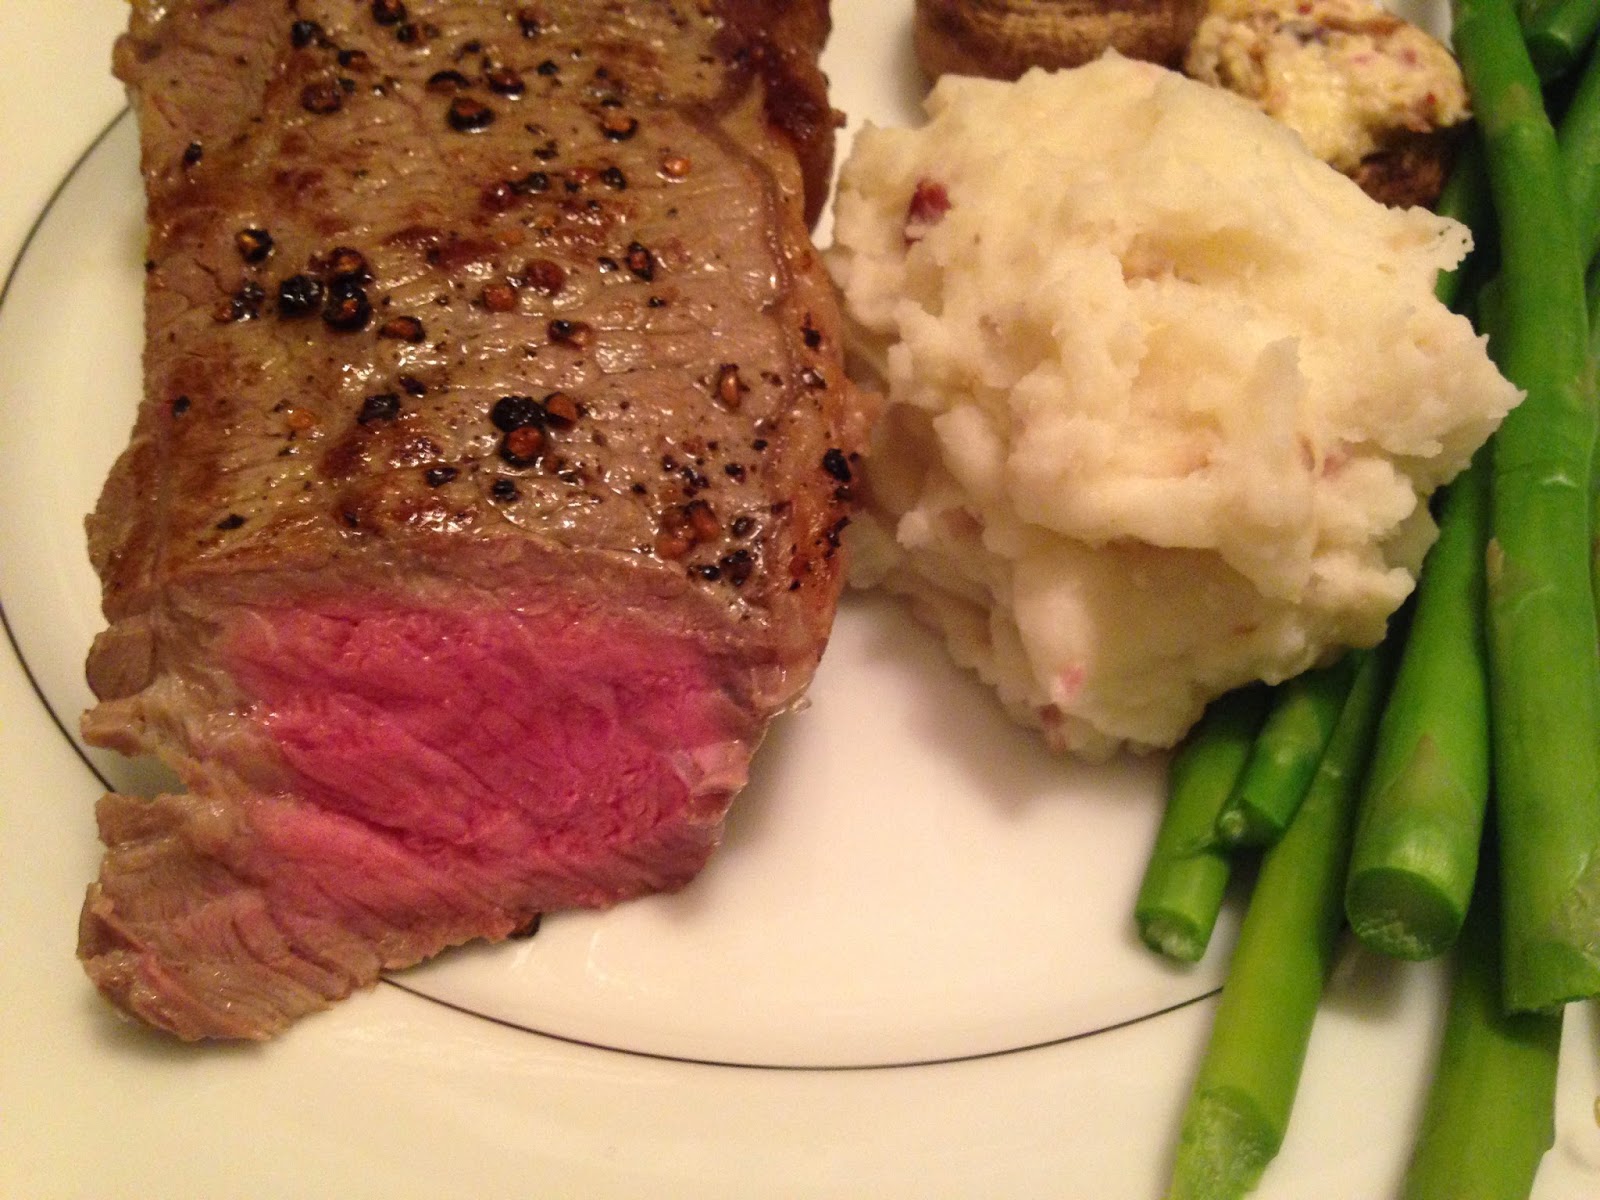
5 Minute Cast Iron Grilled Steak

I love my cast iron skillet. It is the best investment I have spent on a pan. Unlike my nonstick, which I have to replace every year, my cast iron skillet will be with me for a long time. The versatility of cast iron is amazing, as it can go easily from stovetop to oven. If you have a cast iron skillet or are curious what type of recipes cast iron skillets can make, check out my cast iron recipes here.

For Valentine's Day, I purchased a jumbo pack of strip loin steaks which was on sale. Each steak weighs about a pound. I looked for a recipe online that allowed me to use my favorite skillet to cook my steaks and came across this Alton Brown recipe. The beauty of this recipe is that the steak takes only 5 minutes to cook; great for any night really. Cast iron for the win again!


Ingredients
Steak (1 inch thick)
Oil
Salt and pepper, to taste

Directions
1. Take the steaks out of the refrigerator 20 minutes before cooking to allow the meat come to room temperature. This allows the steak to cook evenly.


2. Place the cast iron skillet in the oven and preheat to 500 degrees F.


3. Lightly oil the steaks and season with salt and pepper on both sides.


4. Once the oven temperature reaches 500 degrees, take the cast iron skillet out of the oven.

5. Turn the stove to high and heat the cast iron skillet for 3 minutes or until it just starts smoking. Do not add any oil to the skillet.


6. Place steaks on the cast iron skillet and sear for 30 seconds.


7. Flip and sear the other side for another 30 seconds.


8. Once both sides have been seared, place the steak in the oven and cook for 2 minutes.

9. Take the steak out of the oven, flip and cook for another 2 minutes in the oven.

10. Remove steak from the cast iron skillet and allow it to rest on a plate loosely covered with tinfoil for 5 minutes before serving. Are you hungry yet?


Source: Food Network

2.20.2015

Red Bean (Azuki) Paste (Free of Top Allergens)

My mom loves red bean. Growing up, our pantry was always stocked with at least a bag or two of dried red beans. We regularly had red bean steamed buns, red bean soup, red bean glutinous rice balls (recipe here), red bean pancakes, red bean and rice; see a common theme?

As a child I loved red bean. But I went through a phase in my 20s when I was not a fan of red bean and would cringe every time I see it. I guess after many years of not eating it ALL. THE. TIME., I started liking red bean again.

Recently, for Chinese New Year, I made Sweet Red Bean Glutinous Rice Balls. It brought back good memories of my childhood as I carefully bit into each glutinous rice ball and savored the smooth sweet red bean paste.

This red bean paste recipe is easy but requires some time to soak and cook the red beans. Traditionally, red bean paste does not have butter in it (at least not my mom's version) but I like the addition of butter in red bean paste as it adds a richer taste. My little man ate a bowl of red bean paste on its own and kept asking for more. I guess he must take after grandma.


Ingredients
400 g (13 oz) dried red beans
Cold water
1-1/2 cups white sugar
2 tbsp butter or vegetable oil


Directions
The Night Before
1. Soak the beans in a large bowl or container overnight for at least 8 hours. Cover the red beans with at least 1 inch of cold water.


The Next Day
2. Discard any red beans that float to the surface. Drain and rinse the red beans.

3. In a large pot, add the red beans and enough water to cover the pot by 1 inch.


4. Bring to a boil over high heat. Once it reaches a boil, reduce the heat to simmer for an hour until the red beans are soft and easily mashed with a spoon.


5. Transfer 1/3 of the cooked red beans to a food processor or blender and puree until smooth. Add a little of the reserved cooking liquid or water if needed. If you are using a blender, you will need to scrape down the sides of the blender a few times. Repeat until all of the red bean has been pureed.


6. Over medium heat, add the pureed red beans, butter and sugar to a large pan. If you are using vegetable oil, heat the vegetable oil first in a large pan over medium heat before adding the red beans and sugar.


7. Cook until the paste is thick (similar to the consistency of tomato paste). Allow the red bean paste to cool completely before using. The pureed red bean paste can be refrigerated for a week or frozen up to a month.

Oh the possibilities of all the things you can make!
Source: Slightly adapted from China Sichuan Food

2.19.2015

Ginger Syrup for Glutinous Rice Balls

This year has been my busiest Chinese New Year (CNY) to date. Between a full deep cleaning and decluttering of our whole house and making 8 of the 9 course CNY meal from scratch, I am so exhausted. Needless to say, I am looking forward to eating leftovers, catching up on writing blog posts and watching Season 5 of Downton Abbey!! Any Downton fans reading this by any chance? (No spoilers please until Sunday evening; we are planning a long binge watching session). :)

As promised in yesterday's post, here is a nice and light ginger syrup you can serve with glutinous rice balls. If you decide to make your own, please check out the Red Bean Glutinous Rice Balls recipe I posted yesterday; it is free of the top allergens).

This ginger syrup is amazing. Not just because it came from my favorite blogger in the whole wide world: Jen Yu of Use Real Butter. It is light, not too sweet and pairs perfectly with my homemade glutinous rice balls. It has a nice light ginger flavor but if you love ginger, add a few more ginger slices.

This was our ninth course in our Chinese New Year dinner feast. Despite being overstuffed, I managed to finish my bowl of glutinous rice balls without any issue.

A nice light dessert.

Happy Chinese New Year! Gung Xi Fai Cai (Mandarin) or Gung Hay Fat Choy (Cantonese). (Translation: This means best wishes for a prosperous new year.)

Wishing you and your loved ones a happy, healthy, prosperous Year of the Sheep.

Photo Credit: Photo.elsoar.com


Ingredients
2 cups water
3 tbsp brown sugar
5 slices ginger

Directions
1. In a small saucepan, mix the water, brown sugar and ginger. Bring to a boil on high heat.


2. Reduce heat to medium and simmer for 5 minutes. Ladle 1/4 to 1/2 cup of ginger syrup over cooked glutinous rice balls. Serve hot.


Source: Use Real Butter

2.18.2015

Sweet Red Bean Glutinous Rice Balls (Tang Yuan) - Free of Top Allergens

Today is New Year's Eve. Wait, what?

Yes, it is Chinese New Year's Eve. For many Chinese families around the world, this is the biggest celebration of the year. It is the equivalent of Christmas and Thanksgiving merged into one holiday.

The celebration is rooted in lots of tradition; too many to cover in this post but if you are interested, you can read more about it here on Wikipedia.

Each family has their own way of celebrating Chinese New Year. Until recently, we did the bare minimum to celebrate Chinese New Year: putting out oranges, giving away red envelopes, and sharing a Chinese feast with family or friends. This year, we went all out: cleaning our house from top to bottom, wearing new clothes, paying off debts before the New Year, among many other things. One day to go and I am pooped from all the cleaning and cooking!

Three years ago, I started a tradition of making my own Chinese New Year's feast. This year, I have 8 dishes and 1 dessert (all made from scratch except for the dumplings which I outsourced due to lack of time):

2015 Chinese New Year Menu

Dumplings ~ Prosperity
Lettuce cups* ~ Rising Fortune 
Steamed Fish ~ Abundance
Soy Sauce Chicken* ~ Health 
Turnip Cake (Lo Bak Gao)* ~ Good Fortune 
 Jai (Buddha's Delight)* ~ Fortune, Prosperity, Luck
Tea eggs ~ Fertility/Prosperity
Long life noodles* ~ Longevity 
Tang Yuan ~ Togetherness

* I will be posting the recipes next week.

Each dish eaten during the Chinese New Year dinner is symbolic of what you wish for the coming year: health, luck, fortune, fertility, longevity, prosperity, abundance, togetherness, and etc. This recipe for glutinous rice balls (tang yuan) signifies togetherness.

Glutinous rice balls are served at festivals or at Chinese New Year as a dessert. It can have many different types of fillings: red bean, sesame, peanut, among others. Despite its name, glutinous rice balls do not contain any gluten, so it is safe for people with Celiac or those allergic to wheat (please always read labels). Store bought glutinous rice balls can be unsafe for people with food allergies, so this year, I made my own.

Overall, the recipe is relatively easy, especially if you use store bought red bean paste. The most time consuming part was rolling each rice ball. I thought this is a worthwhile recipe to make as my little man (who is allergic to peanuts and almonds) can enjoy. This recipe is free of top allergens and is a great way to celebrate togetherness with my family.

Glutinous rice balls with ginger syrup

Ingredients
1 cup glutinous rice flour
1/2 tbsp vegetable oil (do not use olive oil)
1/4 cup room temperature water
1/4 cup red bean (azuki) paste (homemade recipe here)


Directions
1. In a bowl, mix glutinous rice flour, oil and water together. Add more water by the tablespoon until it is silky smooth and does not stick to the sides of the bowl. Cover with plastic wrap until you are ready to make the rice balls. Note: Do not refrigerate the dough (at this point) as it will make the dough brittle.


2. Scoop 3/4 of a teaspoon of red bean paste on a plate. Repeat until you have 16 red bean balls. Cover with plastic wrap and place in the freezer for 10 minutes.


3. Line a rimmed baking sheet with plastic wrap.

4. Take the red bean balls out of the freezer. Roll each piece between the palms of your hands so it forms a round ball. Wash your hands so you do not get the red bean paste all over your glutinous rice balls.

5. On a cutting board, divide the dough into 16 equal pieces. Cover with plastic wrap so the dough does not dry out.


6. Powder your hands with a bit of glutinous rice flour. Using your hands, flatten the edges of the dough into an oval, making sure not to flatten out the center. If the dough breaks apart, dip the dough in some water.


7. Place a red bean ball in the center of the oval, fold the dough over and seal. Lightly roll it into a ball with the palms of your hand.


8. Put the rice ball on the plastic wrap lined baking sheet, making sure there is lots of space between each rice ball. Repeat with the remaining ingredients.


Cooking Instructions
1. If you are eating right away, bring a pot of water to boil. Turn the heat down to a simmer and drop in the rice balls. Stir occasionally to prevent the rice balls from sticking to the bottom of the pot.

Do not boil the rice balls on high heat as this causes the filling to burst. You have been warned. :)

2. Using a slotted spoon, fish out the rice balls once they float.


3. Eat on its own or serve with ginger syrup (highly recommended).


Freezing Instructions
Cover the rice balls with plastic wrap and freeze for 2 hours until it is frozen solid. Transfer to a Ziploc bag.


Source: Slightly adapted from Instructables