Showing posts with label Drinks. Show all posts

7.28.2015

Jamba Juice Strawberries Wild Smoothie Copycat Recipe

Summer used to be my favorite season of the year. At the end of each school year, I would happily draw up a list of "Must Do Activities" and check them off as I accomplished them.

I mean, what's not to like about Summer? Warm days, no school, later bedtime, and endless playing around outside (unchaperoned) with the only mandate to return home before it got dark. I rode my trusty bike everywhere, read all of my favorite books and met up with friends to play. I basked in the warm Summer sun for hours on end.

Since I have transitioned to the role of being a Stay At Home Mom, my days are filled with activities for the little man. While I may not enjoy Summers as much since I have become a heat wimp with a never-ending to do list, I experience sheer joy watching my son playing at the water park, riding his bike, kicking a soccer ball or blowing bubbles. Most of these things are a daily Summer time ritual for us since the little man loves playing outside.

To cope with the intense heat wave we had lately, we would cool off with this delicious Jamba Juice strawberries wild smoothie copycat recipe. I love this strawberry smoothie so much that I have been making it on a daily basis since my discovery 3 weeks ago.

For us, this is the perfect Summer time drink: cold, refreshing and full of nutrients. The best part about this recipe is that it is takes no time to prepare, so you can take this smoothie with you to the park. It is a great way to hydrate and energize your little ones and yourself as you bask in the summer sun (or hide in the shade like I do these days!). This is one recipe that is definitely on my "Must Do" list for the Summer.


Ingredients
3/4 cup pure apple juice (I like Sunrype 100% Pure Apple Juice)
1 cup fresh strawberries
1 cup plain yogurt
1 frozen banana, peeled
3/4 cup ice cubes
2 tbsp honey

Directions
1. In a blender, add the ingredients in the following order: apple juice, strawberries, yogurt, frozen banana, ice cubes and honey. Blend on high for 10 seconds or longer until the ingredients are fully blended and no ice chunks remain. Serve immediately.


Source: Slightly adapted from Rasa Malaysia

3.02.2015

Hong Kong Milk Tea

One of the best things about Hong Kong cafes aside from the delicious food is the Hong Kong milk tea. I had a serious addiction to this milk tea and I would often order it at cafes or from tea houses. In Vancouver, it costs anywhere from $2 to $4 for milk tea and after a while, the costs add up.

Then I discovered that I could make my own at home for a fraction of the price. On a sunny day like today, this is a delicious treat that cannot be beat.


Ingredients
2 orange pekoe tea bags (I like Lipton Yellow Label tea)
1 cup boiling water
2 tsp sweetened condensed milk
1 tsp honey
Ice cubes

Directions
1. Steep the tea bags in hot water until the tea is dark red, about 3 to 5 minutes. Discard tea bags.


2. Stir in sweetened condensed milk and honey into the tea until it dissolves. Allow the drink to cool before adding ice cubes. Note: If you add the ice cubes immediately after steeping, this will melt the ice and dilute your drink. It is best to allow the tea to cool to room temperature before adding ice cubes or refrigerate after it cools slightly and allow it to chill.


Source: Slightly adapted from Allrecipes

2.17.2015

How to Chill a Drink in 2 Minutes

I love cold drinks, even in the middle of winter. I never seem to have space in my fridge to chill my drinks so I always end up adding ice to my drinks instead. Ice in drinks works well when you want a cold drink. The biggest downside is that it dilutes your drink.

Last year I saw this kitchen hack on how to chill a drink in 2 minutes. We tried this hack for our Valentine's Day dinner and this hack worked like a charm. Our drinks were ice cold in no time. Cheers!


What You Need
Drinks
Stock pot or thick glass bowl (or cooler and bathtub if you need to chill more drinks)
Salt
Water

Directions
1. In a stock pot, fill with enough water so the drinks float in the pot.


2. Add as much ice as you have available. Wikihow recommends a ratio of 50/50.


3. Throw in a small handful of salt and stir.

We may have added a little more than a handful of salt...

4. Allow the drink to sit for 2 minutes. If the drink does not feel ice cold to your liking (or because there's not enough ice in the pot), let the drink sit in the stock pot for an additional 2 minutes.


Source: Wikihow

2.05.2015

3 Ingredient Vanilla Rice Milk (Free of Top Allergens)

Somethings are better homemade. Such is the case with this vanilla rice milk recipe.


On a recent grocery trip, I saw rice milk on sale for $2 for an one litre carton. As part of our nut-free life (my little man has peanut and almond allergies), we read every label and ingredients list. And what do you know, the rice milk has a "may contains" statement for tree nuts so we did not buy it.

Eleven months into nut-free living, I have grown accustomed to making things from scratch. So why not make my own rice milk? I searched the internet and came across a recipe posted by Vitamix (who makes high speed blenders) for a rice milk recipe that only uses 3 ingredients.

The recipe is incredibly simple, yet I still managed to screw it up.

The first time I made it, I doubled the recipe. In my attempt to cajole a hungry toddler, I left out a tablespoon of sugar. Then I added too much of the wrong type of vanilla extract (instead of clear vanilla) which turned the rice milk to a chocolate brown color. The last mistake I made was that I did not blend the rice milk long enough which made the rice milk lumpy. Three big mistakes for an almost foolproof recipe that has only 1 step.

Before I started this blog, I would have called it a day and tried it another time. Since I am committed to all of you, I decided to make this rice milk recipe again.

After following instructions properly this time and learning from my mistakes, the rice milk turned out nice and creamy. My husband and I both agreed it is quite delicious.

This recipe is free of all allergens (except rice), cheap (it costs pennies to make), environmentally friendly (no carbon footprint) and best of all, it is tasty (and free of safflower oil which is in commercially made rice milk)! Have I convinced you yet?

So say farewell to the tetra packs of rice milk and say hello to homemade rice milk. Cheaper, tastier and better for you and the environment!

Ingredients
1/2 cup cooked rice (white or brown, long grain or short grain), cooled to room temperature
2 cups cold filtered water
1 tbsp sugar (white or brown) or sugar substitute (honey)
1 tsp vanilla (optional - regular or clear)
More water for diluting (optional)

Directions
1. Add rice, water, sugar and vanilla to a blender and close the lid.
  • High speed blender (Vitamix, Blendtec): Blend on high for 3 minutes. (Vitamix instructions only: Select variable 1. Turn machine on gradually to variable 10 and then to high. Blend for 3 minutes or until desired consistency is reached). 
  • Regular blender: Blend on high for 5 to 7 minutes or until the desired consistency is reached. You can strain the rice milk for a smoother taste.

2. Taste and dilute with more water (if needed). Refrigerate the rice milk until it is chilled. Shake before drinking.


TIPS
  • If you use white rice, use clear vanilla and white sugar unless you want chocolate colored rice milk. I love chocolate so if it is chocolate colored, it better have chocolate in it!

Chocolate milk or vanilla rice milk?
  • Use more sugar if you like your rice milk sweeter
  • Blend the rice milk in batches if you are doubling or tripling the recipe.
  • Chill the rice milk in the refrigerator for at least an hour or two.

Source: Slightly adapted from Vitamix

1.09.2015

2 Ingredient Vietnamese Hot Coffee Drink

Last summer, I posted a recipe for Vietnamese Iced Coffee, which I believe is a great drink to have all year round. Then I reshared the drink recipe in the middle of December. A reader commented "Really? A cold drink?". I had a good chuckle at the comment as it made me realize that not everyone is as crazy as I am, embracing cold drinks in the middle of winter. And no, I don't live in Hawaii or somewhere warm (I wish though!).

For those of you who like Vietnamese Iced Coffee but want a hot version of the drink, read on. My little man gifted me a screw on Vietnamese Coffee Press this Christmas which I used to make this drink. It's not as straightforward as my existing gravity Vietnamese Coffee Press but it's also not that much complicated either. Keep calm and brew on!

Special equipment: Vietnamese Coffee Press


Ingredients
1-3 tbsps sweetened condensed milk
2-3 tsp French roast coffee (such as Trung Ngyuen)
Hot water

Directions
1. In a mug, add the sweetened condensed milk. I usually add about 3 tbsps for hot coffee and 2 tbsps for iced coffee. Add more or less depending on your personal preference.


2. Place the filter on top of a mug.


3. Add coffee to the filter and screw on the insert so it is snug (but not tight).


4. Shake the filter (gently!) so the coffee grinds even out.


5. Fill 1/3 of the filter with hot water and wait 20 seconds.


6. Unscrew the insert 2 turns (with the tip of a clean dinner knife) and fill the filter with hot water. Place the lid on and wait a few minutes for the coffee to drip through. It should drip about 2 to 3 drops per second.


7. Remove filter and enjoy.


Source: Amazon

1.06.2015

Caesar with Spicy Pickled Green Beans

I never used to be a fan of tomato juice, be it Clamato or V8. On the other hand, my husband loves tomato juice and would always order it when we are out.

Then it all changed when I was pregnant with my little man. He altered my taste buds. Foods that I could not stand pre-pregnancy are now a favorite. I was devouring cilantro, tomato juice and ginger like it was going out of style. Oddly enough, to this day, I still love cilantro, tomato juice and ginger.

While shopping at Costco during the Christmas holidays, one sampling station was offering Clamato juice with spicy pickled green beans. I picked up a sample for myself and one for my husband. We both took a sip and said "Yum". It was so good that it prompted us to buy a 4-pack of Clamato juice and a large jar of spicy pickled green beans.

I know it's a little early to make this pronouncement, but I think this is my Drink of the Year. Kudos to Costco for the brilliant pairing and my little man who helped me love tomato juice.

Ingredients
Clamato juice (original)
Spicy pickled green beans
Tabasco hot sauce, to taste (optional)
Worcestershire sauce, to taste (optional)
Slice of lime 


Rimming Salt
1/4 tbsp chili powder
1/2 tbsp kosher salt


Directions
1. Mix the kosher salt and chili powder together. Pour out a thin layer on a plate.

2. Rim a glass with lime and the kosher salt mixture.


3. Add spicy pickled green beans to a tall glass. I like mine spicy so I added 6 pickled green beans.


4. Fill the glass with Clamato juice, add a few dashes of Tabasco hot sauce and Worcestershire sauce to taste. Cheers!


TIP
  • To make it a Bloody Caesar, add Vodka.

Source: Slightly adapted from Motts Clamato and Costco Canada

12.31.2014

Top 10 Posts of 2014

Exactly a year ago, 2013 ended off with a bang. Literally.

My husband and I were celebrating New Years at my Mother-In-Law's when the cork from a sparkling apple juice popped off unexpectedly. The cork hit a light bulb (in the ceiling fan), which shattered into a million pieces all over the living room. All of this happened minutes before the New Year's countdown.

We spent the last 5 minutes of 2013 frantically cleaning, vacuuming and sweeping the living room before counting down to 2014. It was not a relaxed way to celebrate the start the year.

2014 felt equally frantic as it was an eventful year for us (both good and bad). Through all the craziness, it made me realize the important things in life are being healthy and spending quality time with family.

Needless to say, I am hoping for a more relaxed way to end 2014 and hoping 2015 will be a healthier and happier year.

On behalf of my husband, myself and my little man, we would like to make a toast. We wish you and your loved ones a healthy and happy year ahead. Cheers!


And what better way to start 2015 than to try out the top 10 most popular posts on Frugal Allergy Mom.


Need caffeine? Try this recipe for delicious Vietnamese iced coffee.


Top waffles, pancakes, ice cream, turkey and chicken with this versatile Cranberry Blueberry Sauce.


Reuse wrapping paper to make this festive 3D Christmas Tree.


From start to finish, this pizza only takes 35 minutes to make.


A hearty soup to warm you up on a cold winter day.


A quick 20 minute cookie recipe to make when guests pop over unexpectedly!


An easy dessert to impress your guests.


Guaranteed perfect prime rib every time.


Rich and decadent hot chocolate that will curb your chocolate craving. Also great after a day out in the snow.


Fresh homemade bread loaf ready in over an hour!

Please come back and visit in 2015 for more nut-free recipes, frugal tips, allergy management and child development posts.

Happy New Year!

12.09.2014

Rich and Creamy 2 Minute Hot Chocolate


As a child, the only type of hot chocolate I remember was the powdered kind. In my mind, it was delicious. As I got older, I craved a creamier hot chocolate that was rich in flavor. Standing over the stove seemed a little tedious so I bought my hot chocolate from coffee shops, like Starbucks.

My favorite folks at America's Test Kitchen (ATK) came up with an ingenious idea for hot chocolate that can be made in 2 minutes. According to ATK, the secret to a delicious cup of hot chocolate is a rich chocolate ganache, which is made in advance.

The chocolate ganache takes about 3 minutes to make and yields about 10 servings, which can be frozen until the craving hits. Genius? I think so!

This frugal mom will be having a lot of delicious hot chocolates in the future. It is the perfect drink to sip on when it is cold out or while wrapping Christmas presents.

Ingredients
12 ounce semi sweet chocolate chips/wafers (about 1-1/2 cups)
1 cup heavy cream
1/4 tsp salt

Directions
1. Combine all the ingredients in a large microwaveable bowl.


2. Microwave on high for 2 minutes. Take out the bowl after one minute and stir. Return the bowl to the microwave and continue heating for another minute. Take the bowl out of microwave and stir until the chocolate mixture is smooth and coats the back of a spoon.


4. Allow the mixture to cool for 10 minutes on the counter.

5. Cover the bowl with plastic wrap and place the bowl in the fridge for 2 to 3 hours until firm.

6. Spoon 1-1/2 tablespoon of hot chocolate ganache to form 1 inch balls. Wrap in plastic wrap and put into Ziploc bag.


Keeps for 5 days in the fridge or 2 months in the freezer.

To Serve:
1. Place 1 ball of chocolate ganache into a cup (250 ml) of milk. Use whole milk if you like your hot chocolate creamier. Chocoholics: Use two balls of chocolate ganache and 375 ml of milk.


2. Microwave for 2 minutes, watch to make sure the milk does not boil over. Stir. Serve with whipped cream or marshmellows. Repeat as necessary.


Source: Slightly adapted from America's Test Kitchen

12.01.2014

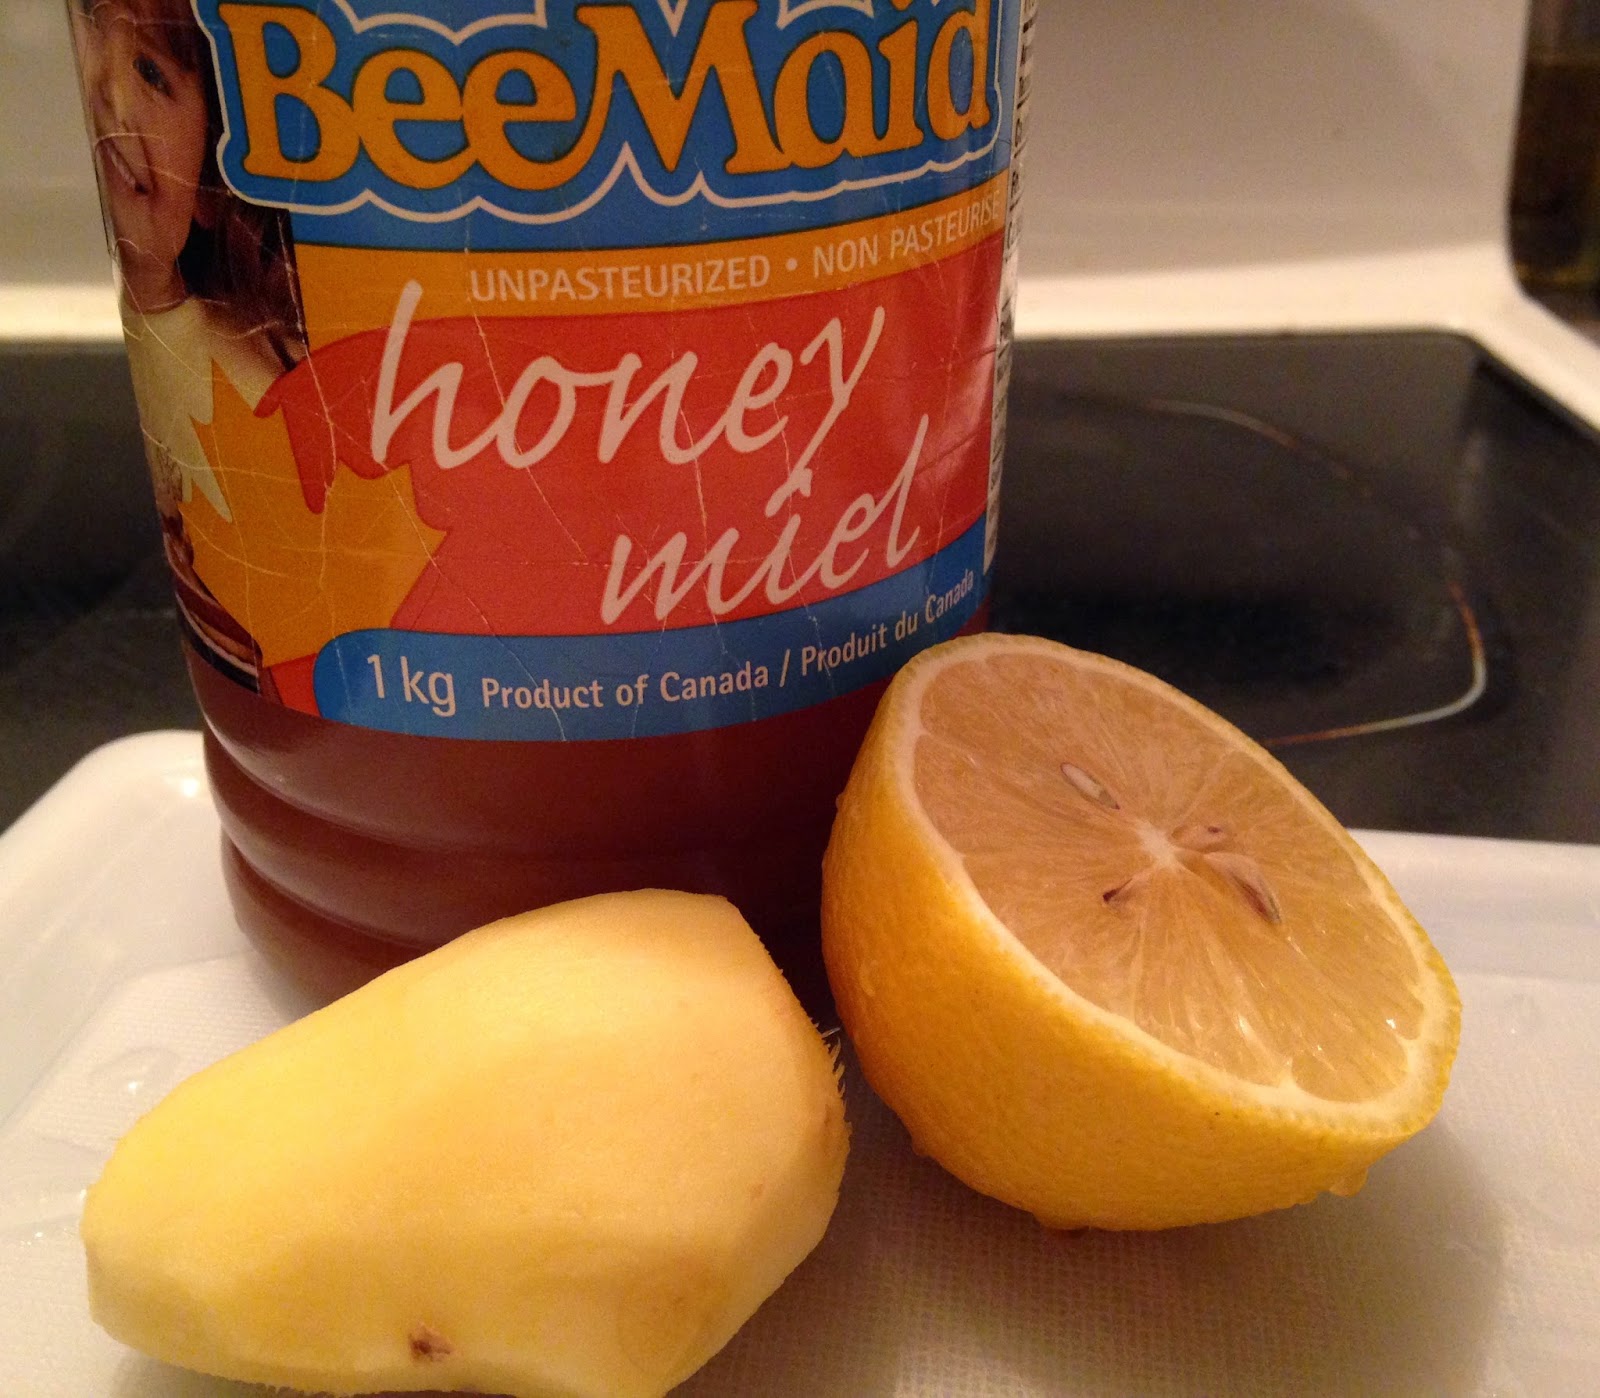
Cold Remedy: Lemon Ginger Honey Drink (Free of Top 8 Allergens)

I moved to Vancouver after graduating from university. It was my first time living on my own. I ate out, slept late and did not take care of my health. As a result, I was constantly getting sick. One of my coworkers was into natural remedies and told me about this Lemon Ginger Honey drink that helps fight off colds.

It has been over a decade since I first had this warm soothing drink. Lemon Ginger Honey is a healthier and cheaper alternative to NeoCitran as the ingredients are found in most households.

The ratio of ingredients below are suggestions only. Add more honey if you like it sweeter, more lemon if you prefer it tangier and more ginger if you like it spicier.


Ingredients
1 knob of ginger the size of your thumb, skin peeled
1/2 lemon
1 tbsp honey
250 ml boiling water


Directions
1. Grate ginger on a micro-plane grater into an empty mug. You can also finely chop the ginger with a knife, reserving any juices.

2. Juice half a lemon into the same mug.

3. Add honey and boiling water. Stir until the ingredients are all mixed.


4. Allow the drink to steep for a few minutes before drinking. You can also use a sieve to filter out the ginger pieces.


5. Serve hot. Repeat as necessary.

Source: Frugal Allergy Mom

10.20.2014

Freezing Whipping Cream

As I mentioned in my post yesterday, I had a litre of whipping cream that was about to expire. I made this Creamy Tomato Sauce Pasta and still had about 625 ml of whipping cream left.

I really have to start using my whiteboard for tracking perishables again. I just can't seem to remember all these due dates anymore.

Island Farms, a Canadian owned dairy company that I love had posted a tip about freezing whipped cream a few months back. I thought I had "pinned" the tip but I cannot seem to find it on my Pinterest board at all.

The process is fairly simple. You whip the whipping cream until stiff peaks form, drop dallops of whipped cream onto a parchment lined baking sheet, freeze until it is solid and place it in a Ziploc bag for later use (in hot chocolates, chai tea lattes, etc).


Ingredients

Leftover whipping cream

Directions
1. In a stand mixer or hand mixer, beat the whipping cream over medium speed for 5 minutes until stiff peaks form. Do not over beat the cream.


2. Using a spoon or piping bag (if you want to be fancy), drop whipped cream by the spoonful onto a baking sheet lined with parchment paper.


3. Freeze for at least 3 hours (cover with plastic wrap on top). Place in freezer bags. Use within a month for best results.


Ideas
  • Top off homemade waffles with whipped cream: