Showing posts with label Kids. Show all posts

7.28.2015

Jamba Juice Strawberries Wild Smoothie Copycat Recipe

Summer used to be my favorite season of the year. At the end of each school year, I would happily draw up a list of "Must Do Activities" and check them off as I accomplished them.

I mean, what's not to like about Summer? Warm days, no school, later bedtime, and endless playing around outside (unchaperoned) with the only mandate to return home before it got dark. I rode my trusty bike everywhere, read all of my favorite books and met up with friends to play. I basked in the warm Summer sun for hours on end.

Since I have transitioned to the role of being a Stay At Home Mom, my days are filled with activities for the little man. While I may not enjoy Summers as much since I have become a heat wimp with a never-ending to do list, I experience sheer joy watching my son playing at the water park, riding his bike, kicking a soccer ball or blowing bubbles. Most of these things are a daily Summer time ritual for us since the little man loves playing outside.

To cope with the intense heat wave we had lately, we would cool off with this delicious Jamba Juice strawberries wild smoothie copycat recipe. I love this strawberry smoothie so much that I have been making it on a daily basis since my discovery 3 weeks ago.

For us, this is the perfect Summer time drink: cold, refreshing and full of nutrients. The best part about this recipe is that it is takes no time to prepare, so you can take this smoothie with you to the park. It is a great way to hydrate and energize your little ones and yourself as you bask in the summer sun (or hide in the shade like I do these days!). This is one recipe that is definitely on my "Must Do" list for the Summer.


Ingredients
3/4 cup pure apple juice (I like Sunrype 100% Pure Apple Juice)
1 cup fresh strawberries
1 cup plain yogurt
1 frozen banana, peeled
3/4 cup ice cubes
2 tbsp honey

Directions
1. In a blender, add the ingredients in the following order: apple juice, strawberries, yogurt, frozen banana, ice cubes and honey. Blend on high for 10 seconds or longer until the ingredients are fully blended and no ice chunks remain. Serve immediately.


Source: Slightly adapted from Rasa Malaysia

7.21.2015

10 Minute Cold Sesame Noodle Salad

Vancouver, or Raincouver, as it is fondly known by locals is going through a heat wave this summer. We have had sunny skies for more consecutive days than I can count and being the heat wimp that I am, I have my fingers crossed for cooler weather and some rain.

With such intense heat, the last thing on my mind is standing over a hot stove. I aim for quick meals that require little stove action which taste delicious and are quick to prepare. This recipe has become a family favorite and my husband declared this as one my of best recipes.

Thinking back on my childhood, this was one of my mom's favorite go-to meals in the summer as well: easy and delicious. Her version uses peanut butter instead of seed butter, but I would highly suggest using seed butter (that contain sesame) as it tastes much better and more friendly for those with peanut/tree nut allergies!


Ingredients
454 g spaghetti or thin egg (Chow Mein) noodles
1 large cucumber, julienned
2 medium carrots, julienned
2 stalks green onions (optional)
1/2 cup chopped cilantro (optional)
Sesame seeds, for garnish (optional)

Sauce
1/3 cup seed butter (preferably one that contains sesame)
1/4 cup soy sauce
2 tbsp rice vinegar
3 tbsp sesame oil
2 tbsp brown sugar
1/4 tsp freshly ground black pepper
1 tsp freshly grated ginger
1/2 tsp Sriracha hot sauce, or hot pepper flakes (optional)

Directions
1. Boil water in a large pot over high heat. Cook spaghetti noodles according to package directions, drain and soak the noodles in cold water until it is cool to the touch. Drain again.

2. In a small saucepan over medium-low heat, mix the seed butter, soy sauce, rice vinegar, sesame oil, brown sugar, black pepper, ginger and hot sauce together. Stir and simmer the sauce until it is smooth.

3. Pour the sauce over the cold noodles and toss with cucumber, carrots, green onions and cilantro (if using). Garnish with sesame seeds. This can be chilled or served at room temperature. Personally, I find this noodle salad taste the best after chilling in the refrigerator for a few hours.


Source: Adapted from Food

5.03.2015

Banana Chocolate Chip Muffins (Kid-Friendly)

My little man got up this morning at 6:45 am instead of his usual 8 am wake up time. Needless to say, it took me by surprise.

With a hot cup of tea in my hand, I sat at the dining table contemplating what to do with a little one full of energy, at 7 am. I am so not a morning person. Yawn.

As I was watching my little man wolf down his cereal and yogurt, I asked my early riser if he wanted to make banana muffins or banana pancakes. With a sparkle in his eye, he clapped his hands and squealed "muff". Okay, muffins it is.

This was the first time my little man and I baked/cooked together. My goodness, I was super surprised by the fact that he is a seasoned pro (for a toddler!). This is all in part thanks to my husband who gets the little man's help on weekend mornings making pancakes. Check out the pictures below of my little man mixing, mashing and stirring the banana muffin batter. Hey, Chef Ramsey, my little man will be a MasterChef (Junior)!


Ingredients
1 cup all purpose flour
1/2 cup whole wheat flour
2 tbsp baking powder
1/2 tsp salt
3 medium, ripe bananas
3/4 cup light brown sugar, lightly packed
1 large egg
1/3 cup butter, melted
1/4 cup chocolate chips (you can add up to 1/2 cup if you want more chocolate chips)

Directions
1. Preheat the oven to 350 degrees F.

2. Combine all purpose flour, whole wheat flour, baking powder, and salt in a large bowl.


3. In another bowl, mash bananas with a fork or potato masher.

"Mas Mas Mas" (aka Mash Mash Mash)

4. Add in sugar, egg, butter to the banana mixture until it is thoroughly combined.


5. Mix the wet mixture into the dry mixture until it is just combined; do not over mix.

Mix Mix Mix.

6. Stir in the chocolate chips.

Mix Mix Mix some more.

7. Divide the batter evenly among 12 muffin cups (greased or lined with muffin liners).


8. Bake for 20 to 25 minutes or until the muffins are golden brown.


Source: Adapted from 201 Organic Baby and Toddler Meals

4.09.2015

Free Swimming at Greater Vancouver Recreation Centres

Growing up in an immigrant family, we were all about free or inexpensive. My family knew how to stretch a penny, let alone a dollar. Free was the golden word, especially when it came to family entertainment.


If you live in Greater Vancouver, you will be happy to know that Westminster Savings sponsors free public swims at select recreation centres (see the list below). In addition, the City of Vancouver sponsors a free public swim twice a week at Britannia Pool in East Vancouver. Until April 26, 2015, Britannia offers free swimming between 3pm to 4:55pm every Tuesday and Thursday.

Yes, you read that correctly. Free swimming!

Last Sunday, my husband suggested checking out the free public swim at Eileen Dailly Pool. Unfortunately, the free swim conflicted with the little man's need to nap after having too much fun at Burnaby Central Railway (read about our visit here).

From the viewing area, the pool looked busy but not overly packed. We will have to try again as this looks like it would be a great family activity especially if you have young children.

UPDATE: August 2, 2015
We went to the free swim hosted by Westminster Savings on Sunday, August 2nd (aka the first Sunday of the month). Since the free swim was at 12:30, we arrived 15 minutes prior and lined up at Eileen Dailly. We could tell this was a popular event by the crowds who were scattered throughout the viewing area.

Here are some tips for those of you wanting to visit:
  1. Arrive early (at least 15 minutes).
  2. Bring a quarter to rent a locker for the locker room. There are a limited number of large lockers for rent; great for those with little ones.
  3. Supervise your children. With the number of people who attend these free swims, you want to ensure their safety and the safety of others.
  4. Be considerate of others. The showers in each of the washrooms are for you to quickly rinse off; not to spend 15 minutes lathering up. So please, be quick with it and do your full hair conditioning at home.
  5. Lastly, thank Westminster Savings for their generosity! You can follow Westminster Savings on Facebook, Twitter, LinkedIn or Instagram. Even better, go thank them in person at any one of their fourteen branches in the lower mainland.


**Please note that the free swims are subject to change. Please call before you go and arrive early.**

Free Swimming in Greater Vancouver


Location Start End Location Address Phone When

Burnaby 12:30pm 2:30pm Eileen Dailly Leisure Pool 240 Willingdon Ave, Burnaby 604-298-7946 First Sunday of every month
Burnaby 7:00pm 9:00pm Bonsor Recreation Complex 6550 Bonsor Avenue, Burnaby 604-297-4597 First Wednesday of every month
Coquitlam 7:00pm 9:00pm Poirier Sports & Leisure Complex 633 Poirier Street, Coquitlam 604-927-6027 First Sunday of every month
Coquitlam 7:00pm 9:00pm City Centre Aquatic Complex 1210 Pinetree Way, Coquitlam 604-927-6999 Third Friday of every month
Langley 2:00pm 4:00pm WC Blair Recreation Centre 22200 Fraser Highway, Langley 604-533-6170 Second Sunday of every month
Maple Ridge/Pitt Meadows 2:00pm 3:30pm Maple Ridge Leisure Centre 11925 Haney Place, Maple Ridge 604-467-7322 Last Saturday of each month
New Westminster 2:30pm 4:30pm Canada Games Pool 65 East 6th Avenue,New Westminster 604-526-4281 First Wednesday of every month
Port Coquitlam 1:00pm 3:00pm Hyde Creek Recreation Centre 1379 Laurier Ave, Port Coquitlam 604-927-7946 First Sunday of every month
Surrey 2:00pm 5:00pm North Surrey Recreation Centre 10275 City Parkway, Surrey 604-502-6300 Last Saturday of each month
Surrey 6:00pm 8:00pm Newton Recreation Centre 13730 72 Avenue, Surrey 604-501-5540 Second Sunday of each month
Surrey 3:00pm 5:00pm Surrey Sport & Leisure Complex 16555 Fraser Hwy, Surrey 604-501-5881 Third Sunday of each month
Surrey 1:00pm 4:00pm South Surrey Indoor Pool 14655 17 Avenue, Surrey 604-502-6220 First Saturday of each month
Vancouver 3:00pm 4:55pm Britannia Pool 1661 Napier St 604-718-5800 Tuesdays and Thursdays* until April 26, 2015

Please let me know via the comments form below if there are more recreation centres in Greater Vancouver that offer free swims! :)

Source: Westminster Savings and City of Vancouver

2.12.2015

DIY 5 Minute Valentine's Card Ideas: Lion Heart & Love Bunny

February 14th is two days away and most of the men I know are scrambling trying to find the perfect gift. Personally, I think we should show our loved ones how much we love them every day of the year; not only on Valentines Day. Valentine's Day also does not have to be on an expensive and extravagant affair. Sometimes, the best things are made with love.


My little man and I went to Storytime at the library this morning. Miss Tina, our librarian, read "My Heart is Like a Zoo". I loved the heart shaped animals so much that I came home and turned them into Valentine's cards.

This is an easy DIY you can do with your kids and only took me 5 minutes to make one card. All you need are some materials that most of you (with kids) would have lying around the house.

This is a perfect personalized card for Valentine's Day, made from the heart with love.

Materials
Construction paper
Pencil
Black and red marker (i.e. Sharpie)
Scissors
Glue stick


Directions
1. Draw different sized heart shapes on the construction paper. Cut out with scissors. Glue the pieces together and draw on the eyes (and nose for the bunny).

Lion Heart
It takes 4 hearts make this Prince Lion Heart.

For your "mane" valentine.

Love Bunny
It takes 6 hearts and 2 ears make this Love Bunny.

Love bunny (front).

Love bunny (back).

Source: Designs inspired by My Heart is Like a Zoo

Disclosure: This post contains affiliate links.

1.15.2015

Chinese Fried Rice

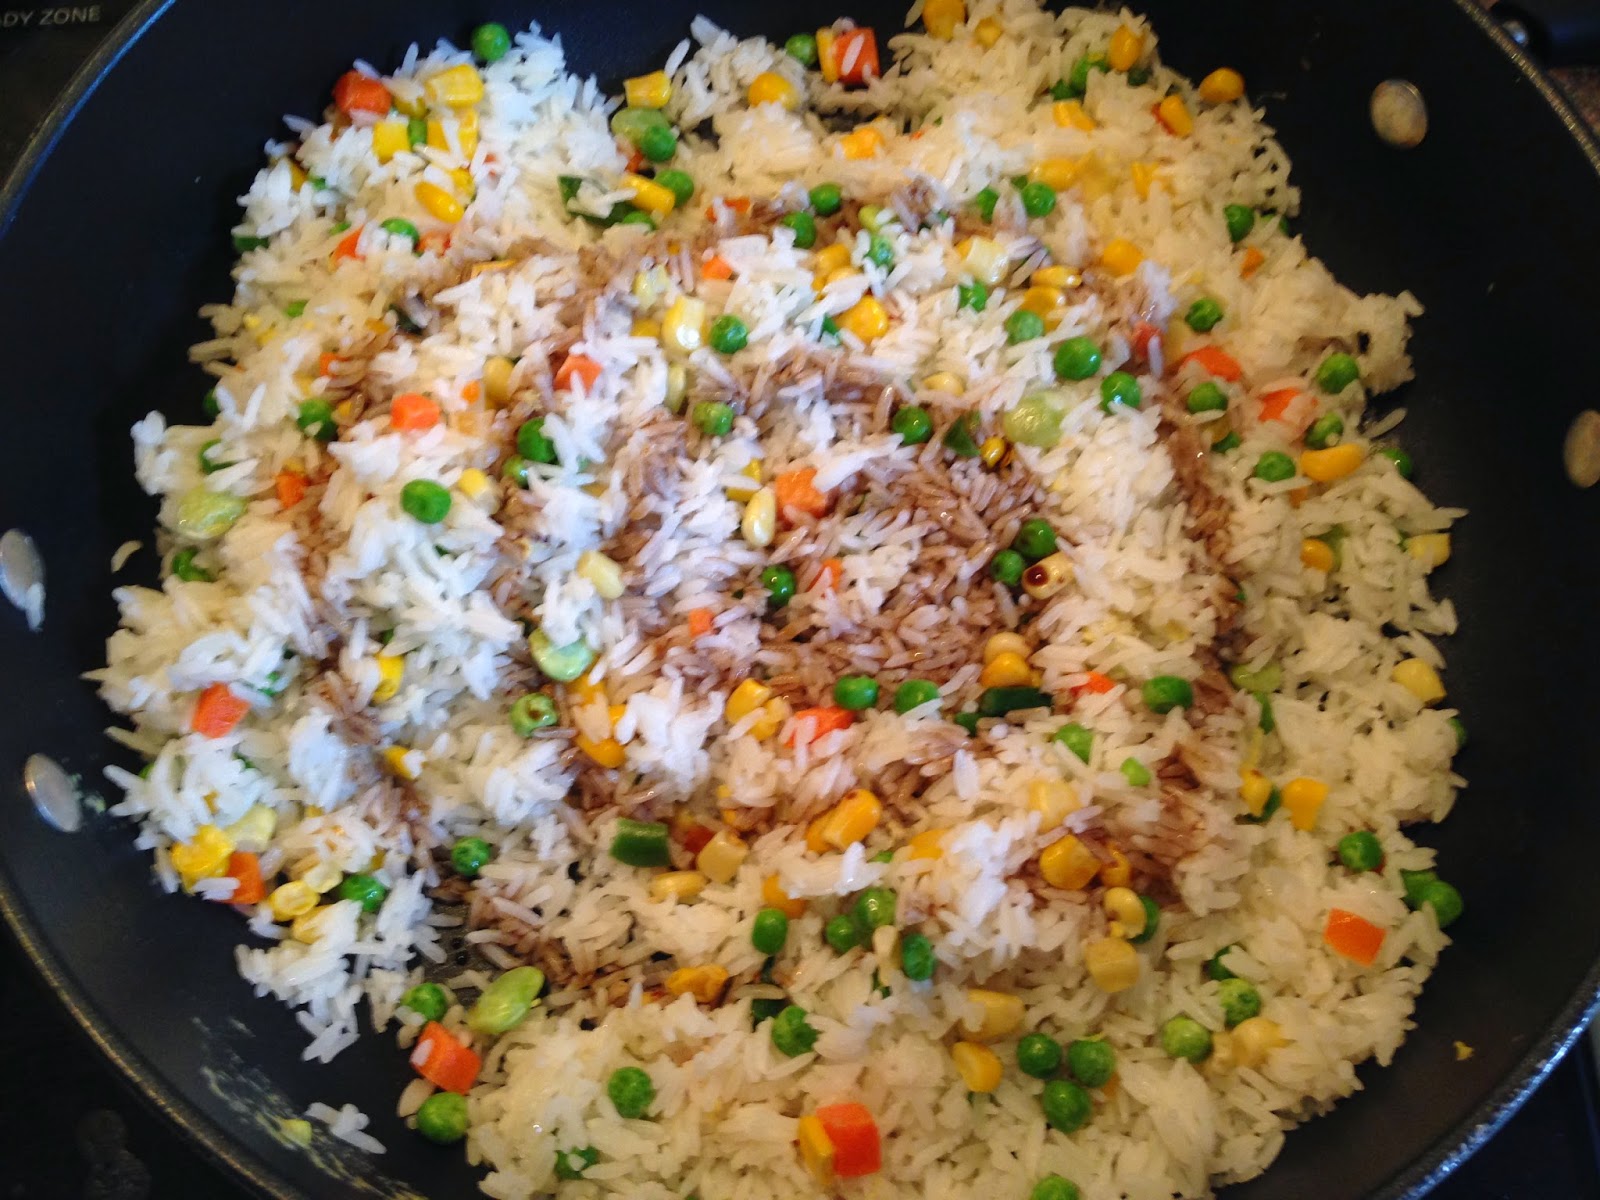
Chinese fried rice is one of the simplest dishes in Chinese cuisine, right next to congee (Chinese porridge). Unlike congee, fried rice can be whipped up in under 10 minutes, whereas congee takes at least an hour to make. Congee is not ideal when you are hangry (angry because you are hungry) and need food right away. Depending on the state of my hunger, I would either make a basic no frills fried rice (read below) or make shrimp or kimchi fried rice (latter is a Korean dish).

If you find yourself in my shoes, feeling a little hangry and need food NOW, make some plain fried rice, which will be ready in under 10 minutes. Day old rice works best, so make a few extra cups of rice the next time you make dinner and use the leftover rice for making fried rice the next night. Sometimes, the simple things in life are the best things.


Serves: 4

Ingredients
4 cups cooked rice (day old)
4 eggs, beaten
2 cups frozen vegetables
1 sprig of green onion, chopped
Pinch of salt
2 tbsp vegetable oil, separated
2 tbsp soy sauce (optional)
1 tsp sesame oil (optional)

Directions
1. In a large saute pan, heat 1 tbsp of vegetable oil over medium high heat.

2. Add a pinch of salt to the beaten eggs.

3. Once the oil starts to shimmer, pour the beaten eggs into the saute pan and scramble until it is still soft, but not fully cooked. Set aside.


4. To the same pan, add 1 tbsp of vegetable oil.

5. Add in the cooked rice, breaking it apart with a wooden spoon. Stir frequently.

6. Make a empty space in the middle of the pan and add the frozen vegetables. Stir until the frozen vegetables are cooked through.


7. Pour in soy sauce and sesame oil. Mix.


8. Add scrambled eggs and green onions, stir fry until combined.


9. Serve immediately.

I love adding ketchup and siracha hot sauce to my fried rice.

Source: Frugal Allergy Mom

1.05.2015

8 Ideas to Prevent Kitchen Burnout

In most households, the cooking duties generally defaults to one person. In our household, that task falls squarely on my shoulders. It has been this way ever since my husband and I got married.

Up until my son was diagnosed with nut allergies, we would eat out on nights when I am too tired to cook. For many food allergy moms or people with food allergies, this is generally not a viable option.

In December of 2014, after over half a year of non-stop cooking, baking and making almost everything from scratch, I felt burnt out. Products I used to purchase were off limits as they often had "may contains" and my kitchen has now turned into a mini bakery, stocked with every possible kind of non-nut flour imaginable. I still loved to cook but I knew that I needed to ask for help or find other ways to alleviate the stress of meal preparation. I thought long and hard of other ways to find a balance between feeding my little man safe foods and keeping my sanity.

Over the Christmas holidays, I had a period of two weeks where I was no longer the main provider of all the meals. This allowed me some time to recharge and think of ways to prevent kitchen burnout in the future.

I have come up with eight ideas to prevent kitchen burnout for those with food allergies or those looking to get a break from the kitchen.

1. Ask Other Family Members to Help (ie. Spouse, Partner or Kids)
This can be the hardest thing to do for some of us. In our household, my husband is in charge of weekend breakfasts. In addition to his breakfast duties, he is also the backup chef in this house. This means pitching in to make a quick meal when I am busy.

Here are other things your spouse/partner/kids can do:
  • Food preparation: peeling potatoes, washing vegetables, getting ingredients out of the freezer to thaw
  • Setting the table: my little man (under 2 years old) and my husband have been tasked with setting the table for dinner each night. Sure the forks are all in one place when the little man is setting the table, but hey, it is one less thing I have to do.
  • Kitchen cleanup: kids as young as 18 months old can take their plates to the sink after dinner. Older kids can help clear the table, load and unload dishes in the dishwasher.
  • Eating area cleanup: kids can wipe the table after dinner, sweep (we are working on this!) and vacuum to make sure the table is clean and ready for the next meal.

2. Big Batch Recipes: Eat Over a Few Meals or Eat and Freeze
40 Minute Whole Wheat Rolls
  • If your family hates eating leftovers, find recipes that freeze well and freeze the leftovers for another meal.

3. Make Ahead Freezer Meals
  • Make ahead freezer meals are great because it essentially allows you to shift the prep work to when you have more time and energy. Even better is that it allows you to take advantage of sales when you can purchase foods at a discount. 
  • I will be trying some of these recipes from Two Under Two and this Chicken Broccoli Rice Casserole. $5 Dollar Dinners offers a great meal plan each week that solves the dinner dilemma.
  • If your family loves pizza, try this 35 minute pizza recipe which can be made ahead of time. Make a few extras and bake when you need a quick dinner.
35 Minute BBQ Chicken Pizza recipe made from scratch.

4. Dining Out at Safe Restaurants
  • This year, one of my resolutions was to find more allergy aware restaurants. We recently added Red Robin Gourmet Burgers to our list of safe eats (see my post here). I am looking forward to trying other allergy aware restaurants in the future.
Interactive menu at Red Robin
  • Things to look for when selecting a restaurant:
    • Has an allergen menu
    • Has knowledgeable and courteous staff who take your concerns seriously and explains their protocol for food handling and preparation
    • Manager or chef is accommodating and knowledgeable, answers questions
    • Has a special food preparation area for people with food allergies
    • Notes allergens upon delivery of food items
    • Good reviews from other allergy families (Check Allergy Eats for some restaurants near you)

5. Finding Allergy Friendly Shortcuts
  • There are a growing number of allergy friendly products where they have a nut-free (or other allergen free) facility. Some allergy aware brands now list both "contain" and "may contain" statements. Based on the Canadian Food Inspection Agency and Food and Drug Administration recalls, you have a good sense of which companies are reliable.
  • As much as I love making foods from scratch all the time, I also like using shortcuts here and there. In my 10 Minute Pulled Pork Tortilla Pizza recipe, I used store bought flour tortillas as my pizza crust.
10 Minute Pulled Pork Pizza recipe

6. Allergy Aware Family Members or Friends
  • We are very lucky to live near my sister-in-law who is becoming more nut allergy aware. She generally invites us over for dinner once every few weeks. After dining safely at her house a few times, we feel comfortable enough not to bring food for our little man. She cooks mostly from scratch when we visit and happily lets us rummage through her kitchen to check for ingredients.

7. Cooking one protein and using it in different meals
Roast chicken dinner. Leftovers used to make this 35 minute pizza.

8. One-pot/Slow Cooker meals (Prep and Go)
One Pot Tomato Basil Parmesan Pasta

Above all, no matter where dinner is, always bring the epinephrine injectors (Epipen or Allerject), ask questions if you are not the one cooking, and check the ingredients if you are. After all, food is supposed to be enjoyable. Give yourself some grace as everyone needs a break now and then from kitchen duties.

What do you do to combat kitchen burnout? Leave your comment below or let me know via Twitter, Facebook, Google+ or Instagram.

1.04.2015

Dining Out With Food Allergies: Red Robin Restaurants

I have been a loyal customer at Red Robin Restaurants for a long time. At one point, my husband and I frequented Red Robin once a week. It was almost a second home for us.

When my little man was diagnosed with nut allergies (peanut and almond), that was a huge change for us as dining out was no longer carefree and must be planned with extreme care.

One night, as I was reading the forums on Peanut Allergy, I discovered that many food allergy families recommend Red Robin Restaurants. I was so elated to read that this restaurant chain takes food allergies seriously.

Based on the recommendations of fellow food allergy parents and visiting Red Robin's website (which lists an Allergen Menu), this gave me the courage to dine out at Red Robin.

Here's why Red Robin will be a second home for us again.

Visit #1 (North Vancouver location) - September 2014
We visited Red Robin for dinner after a fun (but exhausting) day at the Fair at the PNE. Since we were unfamiliar with dining out with food allergies, we brought our little man's food (just in case). Our server was extra patient and explained they had an allergy menu (on an iPad) which allows you to select the allergens to avoid and based on that, it recommends menu items. She also explained that they have a special dedicated area to prepare food for people with food allergies. Moreover, staff wash their hands and the food preparation area is thoroughly cleaned to avoid cross contact.

iPad with an interactive menu

A manager visited our table and explained their process for food preparation and handling. He also answered all of our questions and took our concerns seriously. We felt pretty elated to hear Red Robin had strict protocol in place. With that, we ordered our little man some chicken fingers, milk, seasonal fruit and ice cream (which we ate). The manager personally brought out our food and made a special note of the allergy restrictions on the little man's meal.


Kid's menu. Best $6 I have spent dining out.

We gave the little man a small bite of the chicken fingers, waited 10 minutes before feeding him more. As we had expected, he ate the food without any reactions. We tipped generously and vowed to go back to Red Robin soon.

Visit #2 (North Vancouver location) - January 2015
After a fun day at the Vancouver Aquarium, we decided to dine out at Red Robin's North Vancouver location again because my awesome brother gave us Red Robin gift cards for Christmas.

As we sat down, I notified our server of the little man's nut allergies. The exact same great service was provided, the iPad with the allergen menu was given to us and the little man's food was delivered by a special server (who I assume prepared the food). This time, the server announced the allergens to us: "No Peanuts, No Treenuts, Red Robin Cheeseburger with Broccoli". We were all quite impressed by the consistency. Again, we gave him a little bit of his cheese burger which he ate without any issue.

We will be back
We have had two great visits to Red Robin's North Vancouver location and look forward to visiting them again. In particular, I liked how Red Robin:
  • Has an online allergen menu
  • Has an interactive allergen menu (on an iPad which they give you)
  • Has knowledgeable and courteous staff who take your concerns seriously and explains their protocol for food handling and preparation
  • Has a special food preparation area for people with food allergies
  • Notes allergens upon delivery of food items

So from this Allergy Mom, thank you Red Robin for making my life a little easier. It's nice to know that dining out is possible when you have a second home to go to.

1.03.2015

Onion Dip Recipe and Tips To Eat More Veggies in 2015


One of my New Year Resolutions is to incorporate more vegetables into our daily diet. Those of you who have toddlers, or have been through the toddler years, likely have experienced some angst that your child(ren) is/are not eating enough vegetables. Or perhaps you are the one who isn't eating enough vegetables and want to change that in 2015.

My little man loves fruit but refused to eat most vegetables. In order to get him to eat vegetables, I hid vegetables in meals (spaghetti sauce, bechamel sauce, or in stir-fries). I was pulling my hair out (literally) trying to think of other ways to get the little man to eat more vegetables.

Then I recalled hearing about Jessica Seinfield's (Jerry's wife) book, "Deceptively Delicious" years back. So I borrowed the book from the library.

In Deceptively Delicious, the key to getting kids to eat more vegetables was to feed them vegetables when they are at their hungriest (usually when you are making dinner). Jessica usually served her family a vegetable platter while she is making dinner. For dinner, she would then separate out the protein and carbs and feed the protein as a first course before serving the carbs. In addition, she adds in pureed vegetables to her meals to increase their vegetable intake. Two cheers for Jessica!

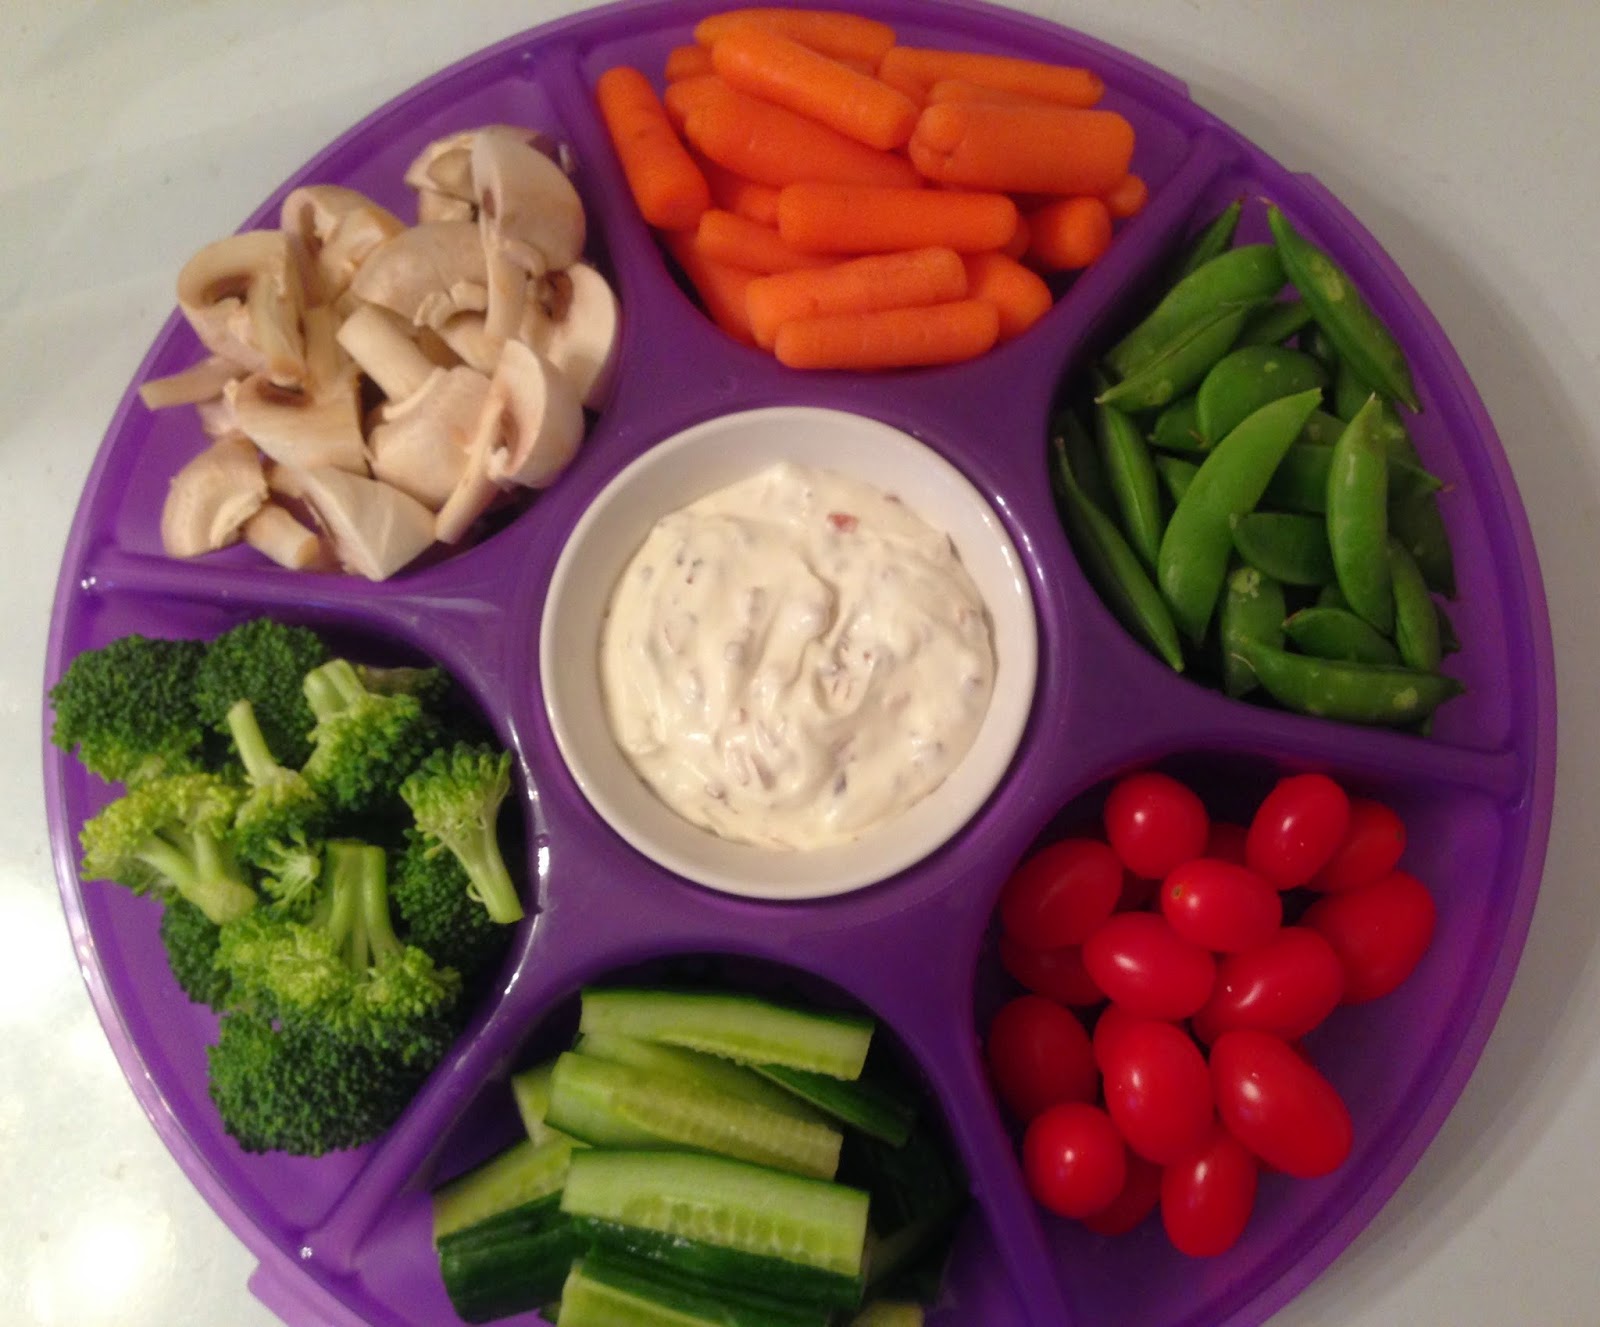
Since November, we have been following her suggestion with success. I plate vegetables for lunch and give it to my little man while I heat up our lunch (generally leftovers from the previous night). While he is eating his vegetable platter, my husband and I would eat ours at the same time. I have found that my little man likes to mimic us so seeing us eating and enjoying our vegetables helps him eat his. I am happy to report that my little man will eat grape tomatoes and mushrooms along with his cucumbers. I have a good feeling he will eventually warm up to snap peas and carrots this year!

The key I have found to eating more vegetables is to buy vegetables you (or your kids) love to eat. For me, this would include grape tomatoes, snap peas, mushrooms, cauliflower and cucumbers. Yes, our grocery bill has seen a slight increase but with our favorite vegetables on a plate, I think we all look forward to eating our vegetables more.

Daily vegetable platter (the dip is notably absent as we only have it as a rare treat)

We had some friends over for lunch today and I served up a vegetable platter as a first course while I made lunch. I made this delicious onion dip to go with the vegetable platter which I know the adults certainly enjoyed.

For this recipe, I would recommend cutting the recipe into a third as making the full recipe yields in a lot of dip! I also omitted the salt called for in the original recipe and substituted in black pepper.

So if you have some wary vegetable eaters in your household, give this dip a try.

TIP: Buy vegetables you love to eat!

Makes: 2 cups

Ingredients - I would recommend cutting this recipe in half or reduce by a third
2 tbsps olive oil
1-1/2 cups diced onions (I used 6 tbsp of dehydrated onions)
1-1/2 cups sour cream (you can also substitute in Greek yogurt)
3/4 cup mayonnaise
1/4 tsp garlic powder
1/4 tsp freshly cracked pepper

Directions
1. In a small saute pan over medium heat, saute onions until it caramelizes. (If you use dehydrated onions, lightly toast it until the onions just turn light brown). Allow the onions to cool.


2. In a separate bowl, mix in the sour cream, mayonnaise, garlic powder and pepper. Fold in the onions.


3. Place the dip in the refrigerator and allow the flavors to meld together for 2 hours before serving.


Source: Food Network

1.02.2015

Date Night Sticks (in a Jar) and 50 Date Night Ideas at Home

Parenting is hard work. Someone once told me that in order to raise happy kids, you need a happy marriage and your spouse/partner should be your first priority (your kids are second). They also mentioned how hard it is to make time for each other when everything else is competing for your attention: work, kids, chores and other commitments.

Reflecting on my own marriage, our date nights are not quite the same now as it was before having our little man. Weekly date nights previously would include heading out to a restaurant for dinner, followed by either dessert, movies at a theatre, random drive to a beach or exploring a new neighbourhood. Nowadays, our date nights are once every three months when we go to the movies while my wonderful sister-in-law babysits the little man.

Those who have kids can attest how expensive and hard to come by good babysitters are. If you are lucky enough to live close to family who offer to babysit, count your blessings!

Last year, I saw this idea for Date Night Sticks in a jar. I thought it was a great way for couples to spend some quality time together at home and reconnect with each other after the child(ren) go to bed.


Materials
Blank craft sticks (you can buy them from the dollar store)
Jar (I reused my Better Than Bouillon glass jar)
Pens/sharpies

Directions
1. Write down each date night idea you have on the craft sticks.

2. Set a date each week/month for a date night. For those date nights you do not have any plans, draw a stick from the date night jar. Since some of these ideas require a little planning, you can draw a date night stick a few nights beforehand so you have time to purchase the materials/ingredients.


TIP
  • We used the other side of the date night sticks to write Play Date ideas for our little man. Here are a few select ideas we had:
    • Find a new playground
    • Build a fort
    • Make a craft

Here are 50 Date Night Ideas at home

1. Dance to your favorite songs
2. Order in take-out from your favorite restaurant and have a picnic in your living room
3. Give each other a massage
4. Take a bubble bath
5. Camp out in your living room
6. Watch home videos
7. Plan a trip
8. Work on a jigsaw puzzle
9. Play a two-person board game (Blokus, Pandemic, Carcassonne, Dutch Blitz)
10. Play a card game (Rummy)
11. Play a children's board game (Connect 4, Guess Who, Twister)
12. Play chess or Chinese checkers
13. Learn a new language
14. Create a scrapbook/photo book of special moments
15. Share a late night snack and chat about the week that ended/coming up
16. Watch a movie (Library, Netflix, or Redbox) and eat popcorn


17. Record a video of how you met (similar to When Harry Met Sally type interview)
18. Make a fort in your living room and chat
19. Find a plant/vegetable to grow in your garden
20. Read a book aloud to one another
21. YouTube Karoke (I'm currently obsessed with "Do You Want to Build a Snowman?")
22. Build a snowman (bring a baby monitor if you have really young kids) and bring a thermos filled with yummy hot chocolate


23. Collect ideas on home renovations/dream home
24. Bake a dessert
25. Try a new recipe and dine by candlelight


26. Make smoothies or milkshakes
27. Sit in the backyard and gaze at the stars on a clear day
28. Have a cheese and wine pairing
29. Plan a picnic
30. Watch a sunset (great in the summer when the sun sets later)


31. Binge watch a new show (I'm personally looking forward to Downton Abbey Season 5!)
32. Create new Date Night idea sticks
33. Paint (on canvas, paper) + wine
34. Invite another couple over for games night (if they have kids, have the all the kids over for a sleepover while the adults have some fun)
35. Create a scavenger hunt for each other
36. Plan and play a prank on someone (keep it safe folks!)
37. Write a story of a memorable moment you shared
38. Cuddle
39. Play a video game (Tetris, Wii games, etc)
40. Set up a String Laser Maze
41. Make a felt story


42. Listen to an E-book together
43. Watch a sports game on TV
44. Blindfold your spouse/partner, feed them various foods and have them guess what it is
45. Watch funny YouTube videos
46. Dress up and take silly pictures of each other
47. Have a theme night (Italian - antipasto, pasta and gelato. Add in a movie like The Italian Job or Roman Holiday)
48. Chocolate/cheese fondue - need I say more?
49. Make a homemade pizza (try my 35 minute pizza recipe from scratch)
50. Learn to make cocktails/mocktails

Source: (Date night sticks) Celebrate Every Day With Me

Disclosure: This post contains affiliate links 

12.25.2014

Merry Christmas!

Nut-free cookies for Santa (It's Dare Maple Leaf Cream, eh?)

For Christians around the world, Christmas is a time to celebrate the birth of Christ. For those who celebrate Christmas, it is also a time to spend with family and gorge on a never-ending supply delicious food. This year marks the first nut-free Christmas for our family since the little man was diagnosed with peanut and almond allergies in March.
While I cannot say that this year has been without its share of difficulties and challenges, I feel blessed by the support we have received from family, friends, fellow food allergy bloggers and the food allergy community. As a result of everyone's support, we learned the importance of carrying and administering epinephrine, allergen avoidance at social gatherings, the need to always read labels and educate others on the seriousness of food allergies.

On the other hand, there have been many good things that have resulted from us being a part of the food allergy community. I have met some incredible and supportive people (through online and in person), made a conscious decision to stay at home to raise my little man (and watch him grow before my eyes), started this blog (meeting some amazing food allergy bloggers in the process), and learned that I am a good cook (from what I'm told). We are eating healthier (most times if you don't count my love of butter and cheese), saving money (from not eating out at restaurants) and supporting one another through challenging times (my husband rocks at this!). Moreover, we learned that while food plays an important role in most of our social gatherings, it does not have to be the end all be all for gatherings to be enjoyable.

So, on this special day, I want to count my blessings for what I have and give thanks: to God, to my wonderful husband, my amazing little man, our families, old and new friends and amazing companies who support the food allergy community. Merry Christmas everyone!

Stanley Park in Vancouver is our oasis when we need a break from everything.

12.24.2014

DIY Paper Christmas Tree Ornament


I love quick and easy Do-It-Yourself projects. This Pinterest project for an origami folded Christmas tree takes less than 10 minutes. It is an easy project for kids, adds a festive touch to your Christmas dinner table and best of all, you can reuse wrapping paper (destined for the trash) from all those Christmas gifts.

If you make this Christmas tree, please send me a tweet @frugalnutfree and let me know how it turned out!

What You Will Need
Wrapping paper, origami paper or printer paper (preferably colorful and thinner paper stock)
Scissors

Video Instructions
I made a video showing how to make a paper Christmas tree in case the step by step instructions below are unclear. This is my first video, so you will have to forgive any little issues. :)


Step By Step Instructions
1. Fold a square piece of paper diagonally. Unfold the paper.


2. Fold the paper diagonally so the creases form an X. Unfold the paper.


3. Fold the paper in half so it is a rectangle.


4. Fold the paper once again so it is a square.


5. Unfold the paper and flip it so the inside of the paper is facing up.


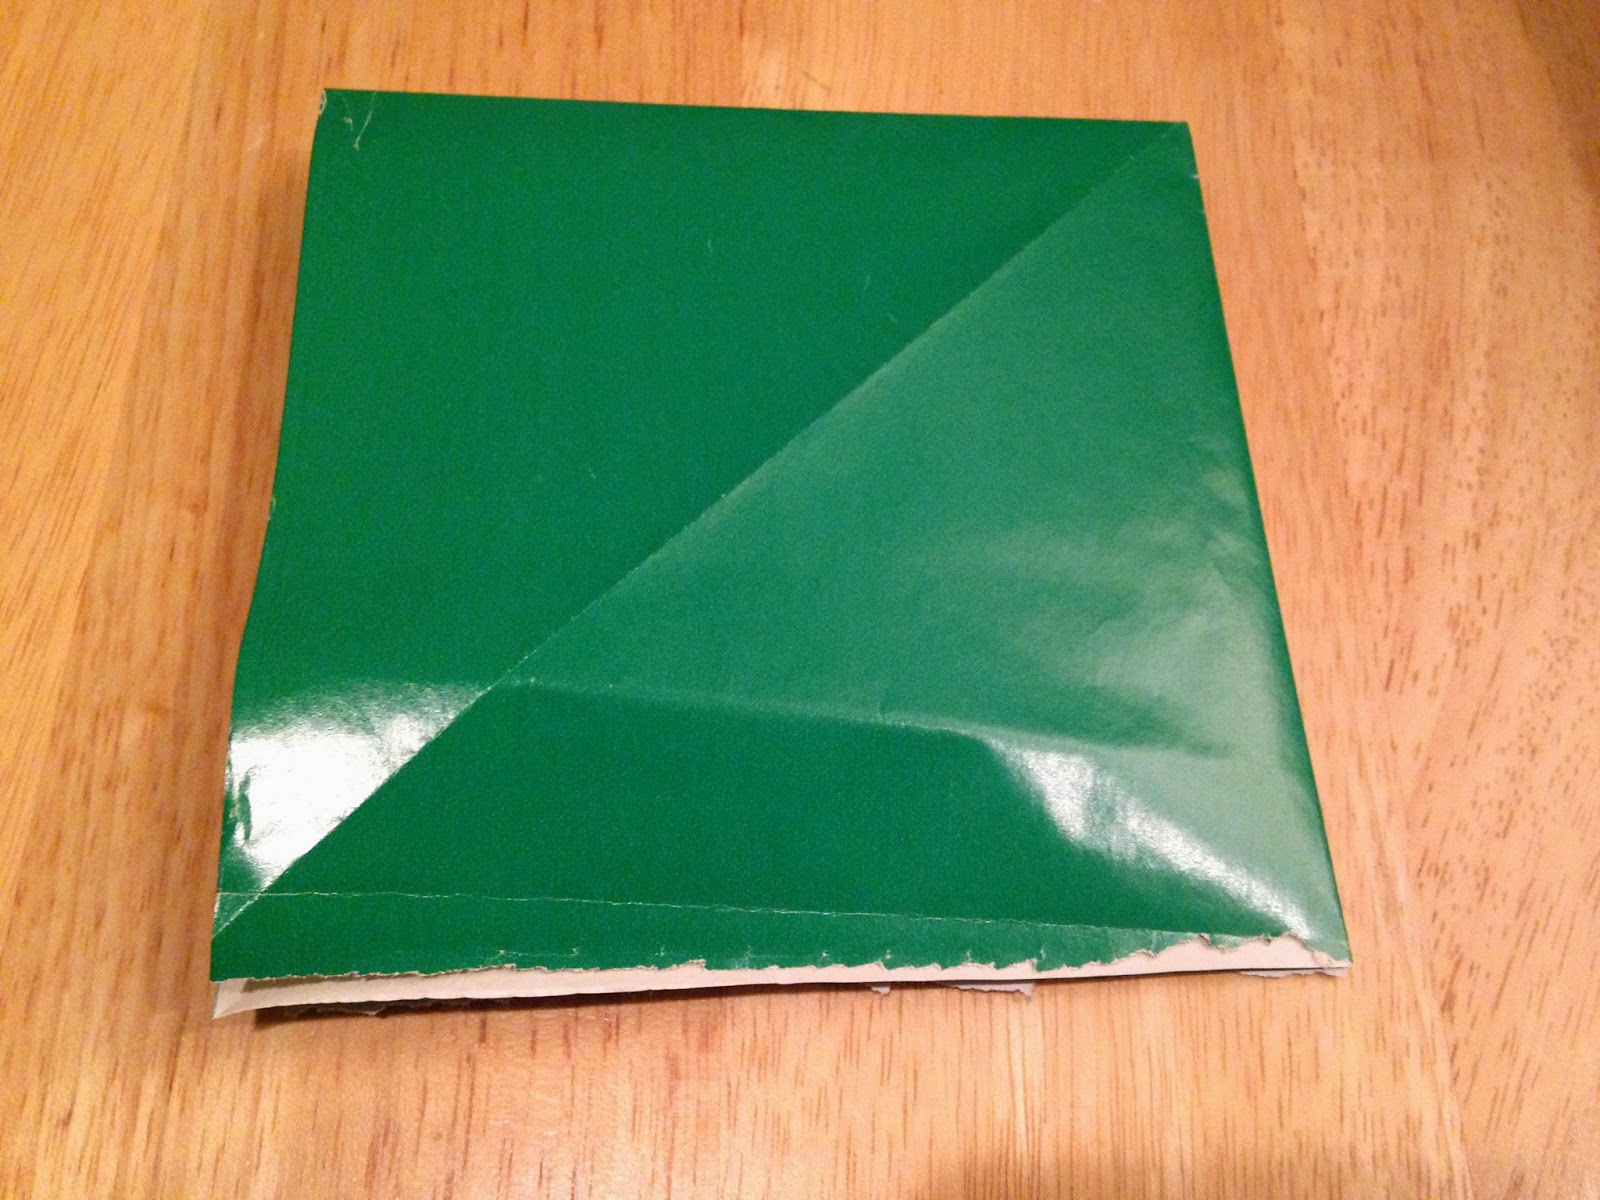
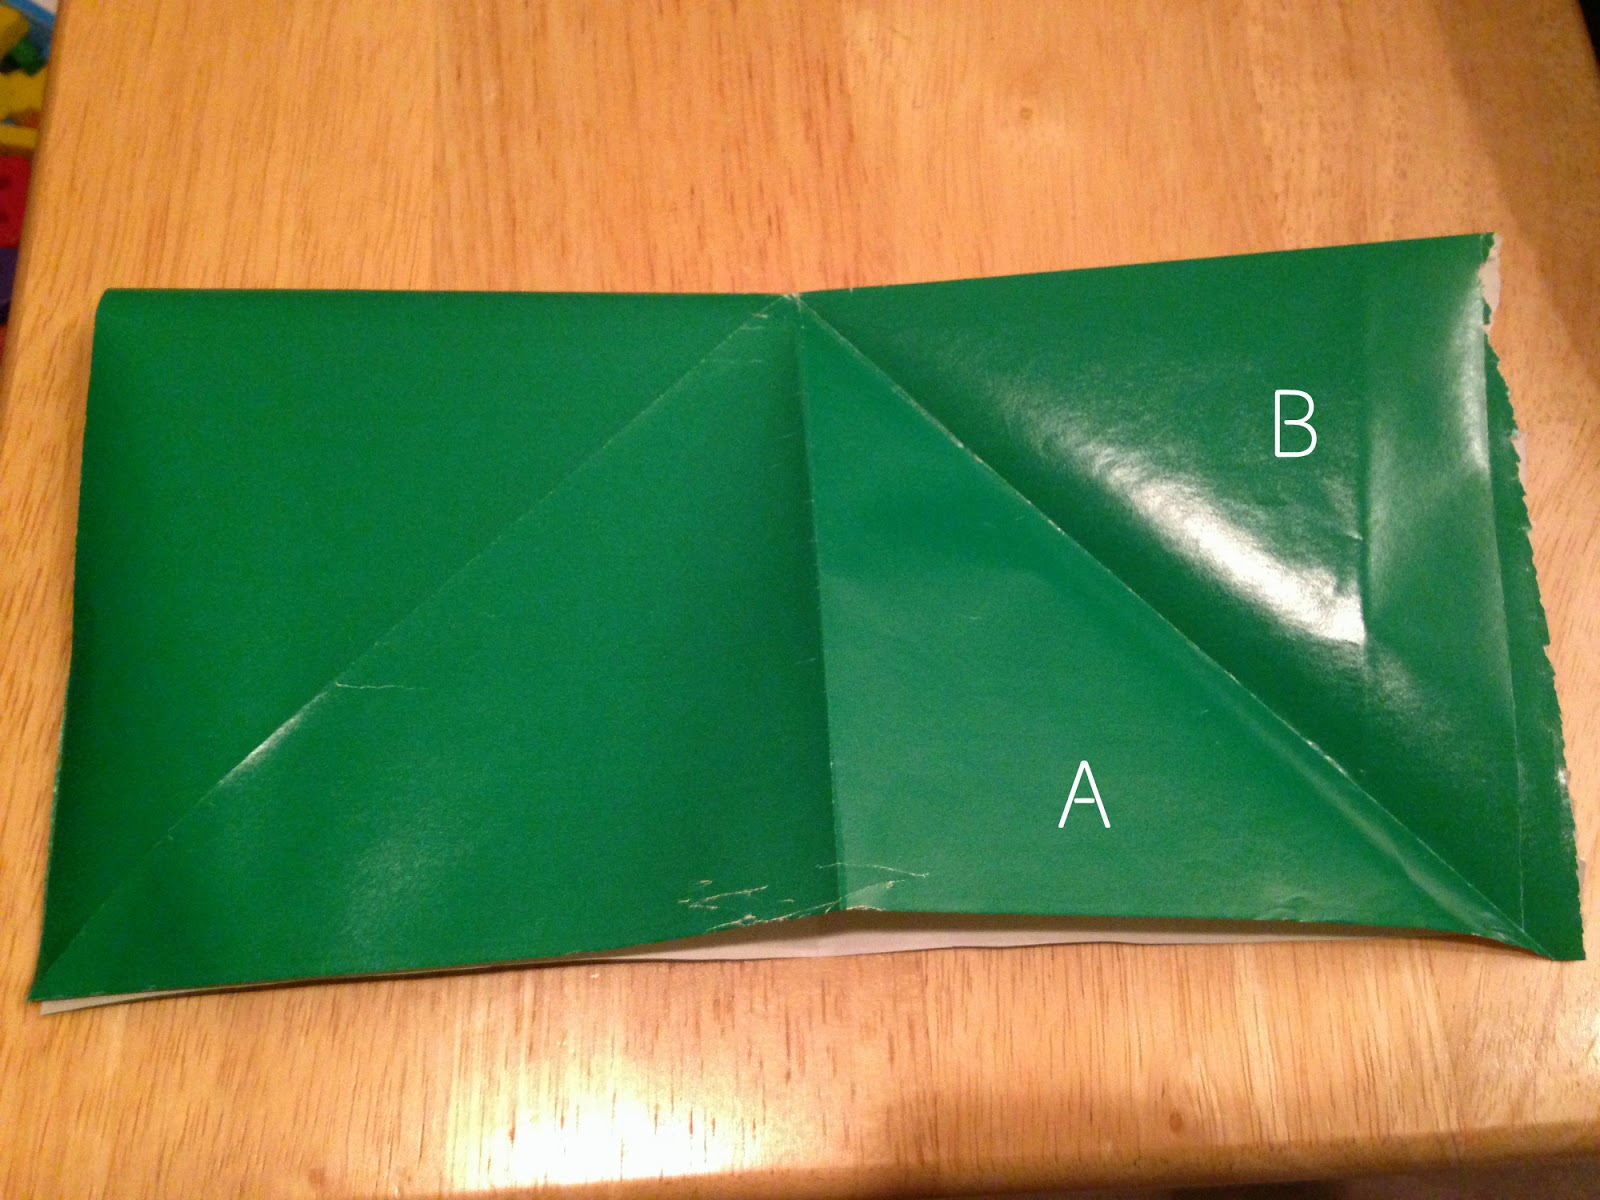
6. Fold the paper in half again. Fold A up to B while holding the bottom piece down and crease so it looks like the picture below. (Jump to 1:20 on the video)


7. Lift D and C fold in C so it looks like the picture below. (Jump to 1:25 on the video to see how it is done)


8. Turn the paper so the open side is closest to you.


 9. Fold the corners so it meets the line in the middle.


10. Repeat on the other side.


11. Unfold one side and tuck the corner in so it resembles a diamond shape. Repeat for the other three sides. (Jump to 2:35 on the video)


12. Trim the bottom of the diamond with scissors so it forms an (isosceles) triangle. Note: adults, please supervise younger children when using scissors.


13. Make 5 or 6 equal cuts on each side, cutting through all the layers. Make sure the cut is not too close to the center line.


14. Fold the sides in so it resembles a tree.


15. Fluff out so the sections are evenly spaced. Decorate your Christmas dinner table!


Source: Krokokat via Pinterest