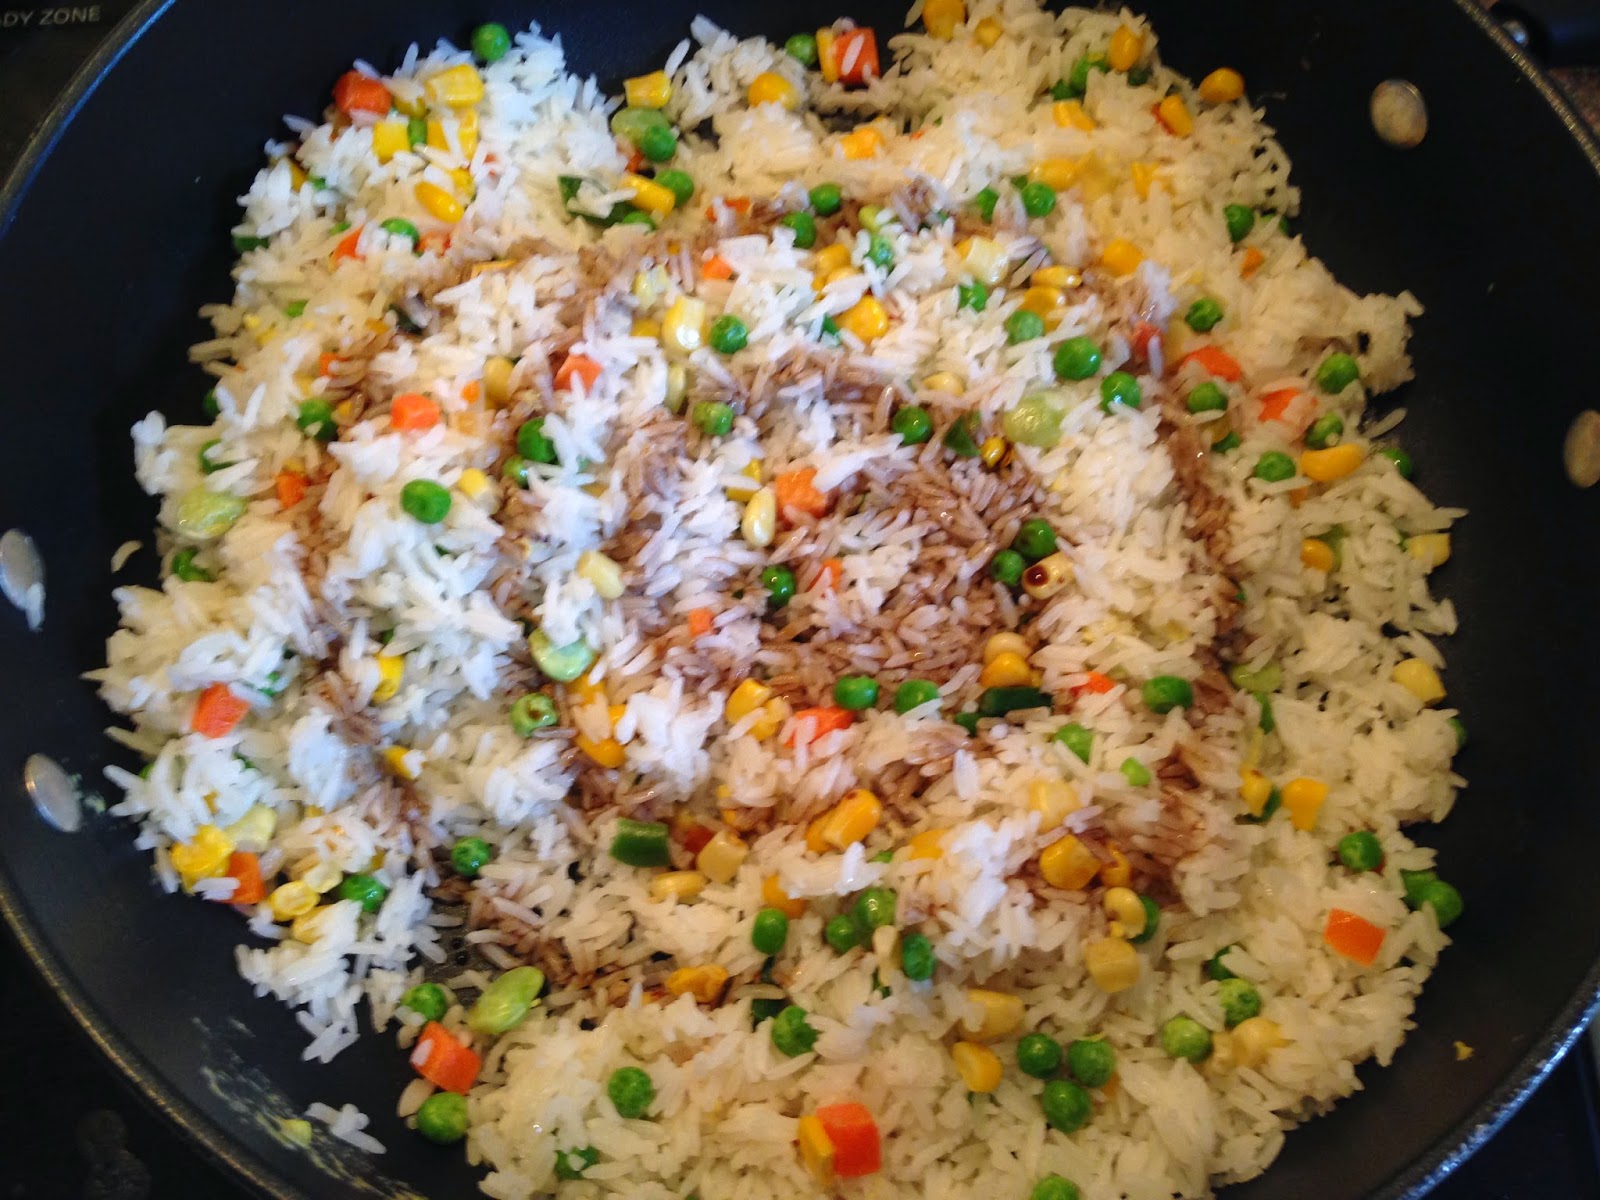
I bought a Costco sized pack of ground pork which needed to be used up. Initially, I had intended to make wontons with it but life got in the way.
I searched the Internet for some recipes and most of the pork recipes seem to be more complicated than I had time for, or needed ingredients that I did not have on hand.
Then I stumbled across a Taiwanese Meat Sauce recipe. It was just the recipe I was looking for: quick to prepare plus I had all of the ingredients on hand. It was a tasty meal that we'll sure to make again.
Ingredients
454 g fresh or dried noodles (I used spaghetti) or rice
3/4 cup reserved shitake mushroom liquid or vegetable broth
2 tbsp dark soy sauce
2 tsp light (regular) soy sauce
1 tsp Chinese black vinegar (or balsamic vinegar)
1/2 tsp Chinese five spice powder
1 tbsp brown sugar
2 tsp cooking oil
1/2 onion, chopped
1 lb lean ground pork
2 cloves garlic, finely minced
120 g dried shitake mushrooms*
Cornstarch Slurry
1 tbsp corn starch
1/4 cup cold water
*Note: If you do not have shitake mushrooms, you can use fresh portabello, cremini or white button mushrooms.
Directions
1. In a big bowl, soak the dried shitake mushrooms with just enough hot water to cover. Place a plate over the bowl and allow the mushrooms to soak for 30 minutes. Reserve liquid. Wash the mushroom under running water, squeeze dry and dice.
2. Boil water in a large pot and cook the noodles according to package directions. Drain.
3. Combine 3/4 cup of reserved shitake liquid, dark soy sauce, light soy sauce, vinegar, five spice powder and brown sugar in a bowl. Set aside.
4. In a large pan over medium-high heat, add oil.
5. Stir in the onion and cook until it is translucent.
6. Stir in the ground pork and cook until it is no longer pink.
7. Create a space in the middle of the pan to cook the garlic. Stir fry until it is fragrant.
8. Add in the mushrooms and cook until the mushrooms are soft.
9. Pour in the liquid mixture, stir and bring the contents to a simmer.
10. In a small bowl, mix corn starch and cold water. Create a well in the middle of the mixture and add the corn starch slurry. Bring to a boil. Once it reaches a boil, allow it to simmer for 10 minutes. Serve hot over noodles or rice.
Source: Slightly adapted from Steamy Kitchen
Frugal Mom To a Nut Allergic Child. Recipes, frugal finds, child development and food allergy management. Posts weekly.
Showing posts with label Rice. Show all posts
2.26.2015
2.25.2015
Crockpot Congee
In the week leading up to Chinese New Year, my little man came down with a runny nose and cough. I felt so bad for him.
When my little man is sick, all he wants is someone to cuddle and hold him. I love cuddling and holding him but it presents some challenges, especially when I am home alone with him. While cleaning can always wait when my little man is sick, we still need to eat.
This is where the crockpot comes in.
You put the rice, frozen (or fresh) chicken breast and water in the crockpot. Turn it on and go cuddle and hold your sick little ones (or whatever else you have going on).
In about 4 to 6 hours, the congee will be ready. It's perfect for those days when you have your hands full.
Ingredients
1-1/4 cup white rice
10 cups water
1 large chicken breast, fresh or frozen
Directions
1. Wash rice until the water runs clear.
2. Add rice, water and chicken breast into the crockpot.
3. Turn to low and cook for 4 to 6 hours until the rice breaks down.
4. Take the chicken out and shred with two forks. Return the shredded chicken back to the crockpot.
5. Stir the chicken in. Serve hot.
When my little man is sick, all he wants is someone to cuddle and hold him. I love cuddling and holding him but it presents some challenges, especially when I am home alone with him. While cleaning can always wait when my little man is sick, we still need to eat.
This is where the crockpot comes in.
You put the rice, frozen (or fresh) chicken breast and water in the crockpot. Turn it on and go cuddle and hold your sick little ones (or whatever else you have going on).
In about 4 to 6 hours, the congee will be ready. It's perfect for those days when you have your hands full.
![]() |
| Just what Dr. Mom ordered. |
Ingredients
1-1/4 cup white rice
10 cups water
1 large chicken breast, fresh or frozen
Directions
1. Wash rice until the water runs clear.
2. Add rice, water and chicken breast into the crockpot.
3. Turn to low and cook for 4 to 6 hours until the rice breaks down.
4. Take the chicken out and shred with two forks. Return the shredded chicken back to the crockpot.
5. Stir the chicken in. Serve hot.
![]() |
| Add some soy sauce and pickled vegetables, mmm mmm good! |
Source: Frugal Allergy Mom
2.18.2015
Sweet Red Bean Glutinous Rice Balls (Tang Yuan) - Free of Top Allergens
Today is New Year's Eve. Wait, what?
Yes, it is Chinese New Year's Eve. For many Chinese families around the world, this is the biggest celebration of the year. It is the equivalent of Christmas and Thanksgiving merged into one holiday.
The celebration is rooted in lots of tradition; too many to cover in this post but if you are interested, you can read more about it here on Wikipedia.
Each family has their own way of celebrating Chinese New Year. Until recently, we did the bare minimum to celebrate Chinese New Year: putting out oranges, giving away red envelopes, and sharing a Chinese feast with family or friends. This year, we went all out: cleaning our house from top to bottom, wearing new clothes, paying off debts before the New Year, among many other things. One day to go and I am pooped from all the cleaning and cooking!
Three years ago, I started a tradition of making my own Chinese New Year's feast. This year, I have 8 dishes and 1 dessert (all made from scratch except for the dumplings which I outsourced due to lack of time):
* I will be posting the recipes next week.
Each dish eaten during the Chinese New Year dinner is symbolic of what you wish for the coming year: health, luck, fortune, fertility, longevity, prosperity, abundance, togetherness, and etc. This recipe for glutinous rice balls (tang yuan) signifies togetherness.
Glutinous rice balls are served at festivals or at Chinese New Year as a dessert. It can have many different types of fillings: red bean, sesame, peanut, among others. Despite its name, glutinous rice balls do not contain any gluten, so it is safe for people with Celiac or those allergic to wheat (please always read labels). Store bought glutinous rice balls can be unsafe for people with food allergies, so this year, I made my own.
Overall, the recipe is relatively easy, especially if you use store bought red bean paste. The most time consuming part was rolling each rice ball. I thought this is a worthwhile recipe to make as my little man (who is allergic to peanuts and almonds) can enjoy. This recipe is free of top allergens and is a great way to celebrate togetherness with my family.
Ingredients
1 cup glutinous rice flour
1/2 tbsp vegetable oil (do not use olive oil)
1/4 cup room temperature water
1/4 cup red bean (azuki) paste (homemade recipe here)
Directions
1. In a bowl, mix glutinous rice flour, oil and water together. Add more water by the tablespoon until it is silky smooth and does not stick to the sides of the bowl. Cover with plastic wrap until you are ready to make the rice balls. Note: Do not refrigerate the dough (at this point) as it will make the dough brittle.
2. Scoop 3/4 of a teaspoon of red bean paste on a plate. Repeat until you have 16 red bean balls. Cover with plastic wrap and place in the freezer for 10 minutes.
3. Line a rimmed baking sheet with plastic wrap.
4. Take the red bean balls out of the freezer. Roll each piece between the palms of your hands so it forms a round ball. Wash your hands so you do not get the red bean paste all over your glutinous rice balls.
5. On a cutting board, divide the dough into 16 equal pieces. Cover with plastic wrap so the dough does not dry out.
6. Powder your hands with a bit of glutinous rice flour. Using your hands, flatten the edges of the dough into an oval, making sure not to flatten out the center. If the dough breaks apart, dip the dough in some water.
7. Place a red bean ball in the center of the oval, fold the dough over and seal. Lightly roll it into a ball with the palms of your hand.
8. Put the rice ball on the plastic wrap lined baking sheet, making sure there is lots of space between each rice ball. Repeat with the remaining ingredients.
Cooking Instructions
1. If you are eating right away, bring a pot of water to boil. Turn the heat down to a simmer and drop in the rice balls. Stir occasionally to prevent the rice balls from sticking to the bottom of the pot.
2. Using a slotted spoon, fish out the rice balls once they float.
3. Eat on its own or serve with ginger syrup (highly recommended).
Freezing Instructions
Cover the rice balls with plastic wrap and freeze for 2 hours until it is frozen solid. Transfer to a Ziploc bag.
Source: Slightly adapted from Instructables
Yes, it is Chinese New Year's Eve. For many Chinese families around the world, this is the biggest celebration of the year. It is the equivalent of Christmas and Thanksgiving merged into one holiday.
The celebration is rooted in lots of tradition; too many to cover in this post but if you are interested, you can read more about it here on Wikipedia.
Each family has their own way of celebrating Chinese New Year. Until recently, we did the bare minimum to celebrate Chinese New Year: putting out oranges, giving away red envelopes, and sharing a Chinese feast with family or friends. This year, we went all out: cleaning our house from top to bottom, wearing new clothes, paying off debts before the New Year, among many other things. One day to go and I am pooped from all the cleaning and cooking!
Three years ago, I started a tradition of making my own Chinese New Year's feast. This year, I have 8 dishes and 1 dessert (all made from scratch except for the dumplings which I outsourced due to lack of time):
2015 Chinese New Year Menu
Dumplings ~ Prosperity
Lettuce cups* ~ Rising Fortune
Steamed Fish ~ Abundance
Soy Sauce Chicken* ~ Health
Turnip Cake (Lo Bak Gao)* ~ Good Fortune
Jai (Buddha's Delight)* ~ Fortune, Prosperity, Luck
Tea eggs ~ Fertility/Prosperity
Long life noodles* ~ Longevity
Tang Yuan ~ Togetherness
* I will be posting the recipes next week.
Each dish eaten during the Chinese New Year dinner is symbolic of what you wish for the coming year: health, luck, fortune, fertility, longevity, prosperity, abundance, togetherness, and etc. This recipe for glutinous rice balls (tang yuan) signifies togetherness.
Glutinous rice balls are served at festivals or at Chinese New Year as a dessert. It can have many different types of fillings: red bean, sesame, peanut, among others. Despite its name, glutinous rice balls do not contain any gluten, so it is safe for people with Celiac or those allergic to wheat (please always read labels). Store bought glutinous rice balls can be unsafe for people with food allergies, so this year, I made my own.
Overall, the recipe is relatively easy, especially if you use store bought red bean paste. The most time consuming part was rolling each rice ball. I thought this is a worthwhile recipe to make as my little man (who is allergic to peanuts and almonds) can enjoy. This recipe is free of top allergens and is a great way to celebrate togetherness with my family.
![]() |
| Glutinous rice balls with ginger syrup |
Ingredients
1 cup glutinous rice flour
1/2 tbsp vegetable oil (do not use olive oil)
1/4 cup room temperature water
1/4 cup red bean (azuki) paste (homemade recipe here)
Directions
1. In a bowl, mix glutinous rice flour, oil and water together. Add more water by the tablespoon until it is silky smooth and does not stick to the sides of the bowl. Cover with plastic wrap until you are ready to make the rice balls. Note: Do not refrigerate the dough (at this point) as it will make the dough brittle.
2. Scoop 3/4 of a teaspoon of red bean paste on a plate. Repeat until you have 16 red bean balls. Cover with plastic wrap and place in the freezer for 10 minutes.
3. Line a rimmed baking sheet with plastic wrap.
4. Take the red bean balls out of the freezer. Roll each piece between the palms of your hands so it forms a round ball. Wash your hands so you do not get the red bean paste all over your glutinous rice balls.
5. On a cutting board, divide the dough into 16 equal pieces. Cover with plastic wrap so the dough does not dry out.
6. Powder your hands with a bit of glutinous rice flour. Using your hands, flatten the edges of the dough into an oval, making sure not to flatten out the center. If the dough breaks apart, dip the dough in some water.
7. Place a red bean ball in the center of the oval, fold the dough over and seal. Lightly roll it into a ball with the palms of your hand.
8. Put the rice ball on the plastic wrap lined baking sheet, making sure there is lots of space between each rice ball. Repeat with the remaining ingredients.
Cooking Instructions
1. If you are eating right away, bring a pot of water to boil. Turn the heat down to a simmer and drop in the rice balls. Stir occasionally to prevent the rice balls from sticking to the bottom of the pot.
![]() |
| Do not boil the rice balls on high heat as this causes the filling to burst. You have been warned. :) |
2. Using a slotted spoon, fish out the rice balls once they float.
3. Eat on its own or serve with ginger syrup (highly recommended).
Freezing Instructions
Cover the rice balls with plastic wrap and freeze for 2 hours until it is frozen solid. Transfer to a Ziploc bag.
Source: Slightly adapted from Instructables
2.05.2015
3 Ingredient Vanilla Rice Milk (Free of Top Allergens)
On a recent grocery trip, I saw rice milk on sale for $2 for an one litre carton. As part of our nut-free life (my little man has peanut and almond allergies), we read every label and ingredients list. And what do you know, the rice milk has a "may contains" statement for tree nuts so we did not buy it.
Eleven months into nut-free living, I have grown accustomed to making things from scratch. So why not make my own rice milk? I searched the internet and came across a recipe posted by Vitamix (who makes high speed blenders) for a rice milk recipe that only uses 3 ingredients.
The recipe is incredibly simple, yet I still managed to screw it up.
The first time I made it, I doubled the recipe. In my attempt to cajole a hungry toddler, I left out a tablespoon of sugar. Then I added too much of the wrong type of vanilla extract (instead of clear vanilla) which turned the rice milk to a chocolate brown color. The last mistake I made was that I did not blend the rice milk long enough which made the rice milk lumpy. Three big mistakes for an almost foolproof recipe that has only 1 step.
Before I started this blog, I would have called it a day and tried it another time. Since I am committed to all of you, I decided to make this rice milk recipe again.
After following instructions properly this time and learning from my mistakes, the rice milk turned out nice and creamy. My husband and I both agreed it is quite delicious.
This recipe is free of all allergens (except rice), cheap (it costs pennies to make), environmentally friendly (no carbon footprint) and best of all, it is tasty (and free of safflower oil which is in commercially made rice milk)! Have I convinced you yet?
So say farewell to the tetra packs of rice milk and say hello to homemade rice milk. Cheaper, tastier and better for you and the environment!
Ingredients
1/2 cup cooked rice (white or brown, long grain or short grain), cooled to room temperature
2 cups cold filtered water
1 tbsp sugar (white or brown) or sugar substitute (honey)
1 tsp vanilla (optional - regular or clear)
More water for diluting (optional)
Directions
1. Add rice, water, sugar and vanilla to a blender and close the lid.
- High speed blender (Vitamix, Blendtec): Blend on high for 3 minutes. (Vitamix instructions only: Select variable 1. Turn machine on gradually to variable 10 and then to high. Blend for 3 minutes or until desired consistency is reached).
- Regular blender: Blend on high for 5 to 7 minutes or until the desired consistency is reached. You can strain the rice milk for a smoother taste.
TIPS
- If you use white rice, use clear vanilla and white sugar unless you want chocolate colored rice milk. I love chocolate so if it is chocolate colored, it better have chocolate in it!
![]() |
| Chocolate milk or vanilla rice milk? |
- Use more sugar if you like your rice milk sweeter
- Blend the rice milk in batches if you are doubling or tripling the recipe.
- Chill the rice milk in the refrigerator for at least an hour or two.
1.15.2015
Chinese Fried Rice
Chinese fried rice is one of the simplest dishes in Chinese cuisine, right next to congee (Chinese porridge). Unlike congee, fried rice can be whipped up in under 10 minutes, whereas congee takes at least an hour to make. Congee is not ideal when you are hangry (angry because you are hungry) and need food right away. Depending on the state of my hunger, I would either make a basic no frills fried rice (read below) or make shrimp or kimchi fried rice (latter is a Korean dish).
If you find yourself in my shoes, feeling a little hangry and need food NOW, make some plain fried rice, which will be ready in under 10 minutes. Day old rice works best, so make a few extra cups of rice the next time you make dinner and use the leftover rice for making fried rice the next night. Sometimes, the simple things in life are the best things.
Serves: 4
Ingredients
4 cups cooked rice (day old)
4 eggs, beaten
2 cups frozen vegetables
1 sprig of green onion, chopped
Pinch of salt
2 tbsp vegetable oil, separated
2 tbsp soy sauce (optional)
1 tsp sesame oil (optional)
Directions
1. In a large saute pan, heat 1 tbsp of vegetable oil over medium high heat.
2. Add a pinch of salt to the beaten eggs.
3. Once the oil starts to shimmer, pour the beaten eggs into the saute pan and scramble until it is still soft, but not fully cooked. Set aside.
4. To the same pan, add 1 tbsp of vegetable oil.
5. Add in the cooked rice, breaking it apart with a wooden spoon. Stir frequently.
6. Make a empty space in the middle of the pan and add the frozen vegetables. Stir until the frozen vegetables are cooked through.
7. Pour in soy sauce and sesame oil. Mix.
8. Add scrambled eggs and green onions, stir fry until combined.
9. Serve immediately.
Source: Frugal Allergy Mom
If you find yourself in my shoes, feeling a little hangry and need food NOW, make some plain fried rice, which will be ready in under 10 minutes. Day old rice works best, so make a few extra cups of rice the next time you make dinner and use the leftover rice for making fried rice the next night. Sometimes, the simple things in life are the best things.
Serves: 4
Ingredients
4 cups cooked rice (day old)
4 eggs, beaten
2 cups frozen vegetables
1 sprig of green onion, chopped
Pinch of salt
2 tbsp vegetable oil, separated
2 tbsp soy sauce (optional)
1 tsp sesame oil (optional)
Directions
1. In a large saute pan, heat 1 tbsp of vegetable oil over medium high heat.
2. Add a pinch of salt to the beaten eggs.
3. Once the oil starts to shimmer, pour the beaten eggs into the saute pan and scramble until it is still soft, but not fully cooked. Set aside.
4. To the same pan, add 1 tbsp of vegetable oil.
5. Add in the cooked rice, breaking it apart with a wooden spoon. Stir frequently.
6. Make a empty space in the middle of the pan and add the frozen vegetables. Stir until the frozen vegetables are cooked through.
7. Pour in soy sauce and sesame oil. Mix.
8. Add scrambled eggs and green onions, stir fry until combined.
9. Serve immediately.
![]() |
| I love adding ketchup and siracha hot sauce to my fried rice. |
Source: Frugal Allergy Mom
1.08.2015
Trinidad Stewed Chicken
Lately, it seems like everyone I know escaped to Hawaii over the winter holidays. My Facebook feed consisted of everyone boasting about tanning, swimming, reading, lazying about in Hawaii.
Meanwhile, the weather in Vancouver is overcast and hovering around 4 degrees Celsius. I longed for warmth and sunshine.
As I was looking through my recipes for dinner, a tweet caught my eye. The office of Charlie Hebdo was targeted by three men killing twelve people, including journalists, cartoonists, police officers and other innocent civilians. My heart aches for the victims and their families as a result of this senseless and cowardly attack.
I was no longer longing for a sunny beach in Hawaii. I felt shaken as the attack was a direct assault on freedom of speech, which is something I value. It was a flashback to September 11th and when Corporal Nathan Cirillo, a Canadian ceremonial guard, was gunned down point blank. It was not a fair fight.
People all over the world started holding signs that said "Je Suis Charlie" (I am Charlie) and pens (symbolizing the freedom of speech) to stand in solidarity with those who lost their lives in Paris yesterday. Now I longed for everyone to have the right to freedom of speech, without fear of retribution or violence. I longed for disagreements using words rather than violence to resolve differences.
As I was making this Trinidad Stewed Chicken, I thought of my friend Tina, who gave me this recipe 5 years ago. Our friendship was a unique one as we are polar opposites in many respects, except when it came to food. The aroma of the chicken simmering on my stove reminded me of a happier time and filled my house with warmth. Though the chicken stew was delicious and enjoyed by everyone, it felt like a dark cloud was hovering above us. I am still sad and confused over how satirical cartoons can be a death sentence for 12 innocent people. It continues to baffle me.
The slain editor of Charlie Hebdo, Stéphane “Charb” Charbonnier, infamously said "I prefer to die standing than living on my knees". I strongly believe the best way to memorialize the 12 victims of the Charlie Hebdo massacre is not be afraid and to continue to exercise our right to freedom of speech. Je Suis Charlie.
Ingredients
3-1/2 lbs boneless, skinless chicken breasts or thighs (cut into 1 inch pieces)
3 tbsp minced green seasonings (chives, green onions, cilantro)
1 tsp minced garlic
1/2 cup chopped onion
1 tsp salt (I omitted this)
1/2 tsp black pepper
2 tbsp vegetable oil
3 tbsp brown sugar (loosely packed)
1 cup chicken broth or water
2 medium tomatoes, diced
2 tbsp ketchup
1 tbsp soy sauce
1 tsp hot pepper to taste, dried chili, red chili pepper or habanero (optional)
1 tbsp butter, added for flavor (optional)
Directions
1. Season chicken with green seasonings (I only used green onions), garlic, onion, salt and pepper. Mix. Cover and allow it to marinate for 30 minutes.
2. Heat oil in a pot over medium heat. Add brown sugar and melt.
3. Add chicken and brown all over, tossing continuously until the liquid dries out.
4. Pour in 1 cup chicken broth (or water), tomatoes, ketchup, soy sauce and hot pepper. Mix. Cover pot and simmer on low-medium heat until the chicken is tender (about 15 to 20 minutes).
5. Optional: Once the chicken stew has finished cooking, add in a tablespoon of butter. Stir and serve over rice, noodles or with a crusty loaf of bread.
Source: Tina HC
Meanwhile, the weather in Vancouver is overcast and hovering around 4 degrees Celsius. I longed for warmth and sunshine.
As I was looking through my recipes for dinner, a tweet caught my eye. The office of Charlie Hebdo was targeted by three men killing twelve people, including journalists, cartoonists, police officers and other innocent civilians. My heart aches for the victims and their families as a result of this senseless and cowardly attack.
I was no longer longing for a sunny beach in Hawaii. I felt shaken as the attack was a direct assault on freedom of speech, which is something I value. It was a flashback to September 11th and when Corporal Nathan Cirillo, a Canadian ceremonial guard, was gunned down point blank. It was not a fair fight.
People all over the world started holding signs that said "Je Suis Charlie" (I am Charlie) and pens (symbolizing the freedom of speech) to stand in solidarity with those who lost their lives in Paris yesterday. Now I longed for everyone to have the right to freedom of speech, without fear of retribution or violence. I longed for disagreements using words rather than violence to resolve differences.
As I was making this Trinidad Stewed Chicken, I thought of my friend Tina, who gave me this recipe 5 years ago. Our friendship was a unique one as we are polar opposites in many respects, except when it came to food. The aroma of the chicken simmering on my stove reminded me of a happier time and filled my house with warmth. Though the chicken stew was delicious and enjoyed by everyone, it felt like a dark cloud was hovering above us. I am still sad and confused over how satirical cartoons can be a death sentence for 12 innocent people. It continues to baffle me.
The slain editor of Charlie Hebdo, Stéphane “Charb” Charbonnier, infamously said "I prefer to die standing than living on my knees". I strongly believe the best way to memorialize the 12 victims of the Charlie Hebdo massacre is not be afraid and to continue to exercise our right to freedom of speech. Je Suis Charlie.
Ingredients
3-1/2 lbs boneless, skinless chicken breasts or thighs (cut into 1 inch pieces)
3 tbsp minced green seasonings (chives, green onions, cilantro)
1 tsp minced garlic
1/2 cup chopped onion
1 tsp salt (I omitted this)
1/2 tsp black pepper
2 tbsp vegetable oil
3 tbsp brown sugar (loosely packed)
1 cup chicken broth or water
2 medium tomatoes, diced
2 tbsp ketchup
1 tbsp soy sauce
1 tsp hot pepper to taste, dried chili, red chili pepper or habanero (optional)
1 tbsp butter, added for flavor (optional)
Directions
1. Season chicken with green seasonings (I only used green onions), garlic, onion, salt and pepper. Mix. Cover and allow it to marinate for 30 minutes.
2. Heat oil in a pot over medium heat. Add brown sugar and melt.
3. Add chicken and brown all over, tossing continuously until the liquid dries out.
4. Pour in 1 cup chicken broth (or water), tomatoes, ketchup, soy sauce and hot pepper. Mix. Cover pot and simmer on low-medium heat until the chicken is tender (about 15 to 20 minutes).
5. Optional: Once the chicken stew has finished cooking, add in a tablespoon of butter. Stir and serve over rice, noodles or with a crusty loaf of bread.
Source: Tina HC
12.21.2014
Shrimp Congee (Chinese Porridge)
Being sick sucks. It's even worse when it is days away from Christmas. We have been on a steady diet of Chicken Noodle Soup, Chicken Rice Soup, and Chicken Congee for the last week and a half.
Since all three members of our family are still sick, I made Shrimp Congee for dinner. I prefer buying shell-on, deveined, medium sized shrimp that has 31 to 40 shrimps per pound. I used the shrimp shells to make a quick shrimp stock which was then added to the congee to give it more flavor.
The little man was so happy to have something other than chicken for dinner (we all were)! He managed to eat a big bowl of congee with 5 shrimps.
Ingredients
2 inch piece of ginger, finely julienned
1 cup white rice
10 cups water
1 cup shrimp stock, optional (see recipe below)
20 medium shell-on shrimp, peeled and deveined (reserve the shell for shrimp stock)
1 tbsp soy sauce
1 tsp sesame oil
Toppings (optional - personally, I love the toppings the best):
Green onion, chopped
Soy sauce, to taste
Red vinegar, to taste
Preserved vegetables (such as Chili Radishes or Bamboo Shoots in Chili Oil)
Directions
1. In a large pot, wash rice until the water runs clear.
2. Add julienned ginger and water and bring to a boil over high heat. Stirring occasionally. (Do not leave the stove unattended as the congee tends to boil over).
3. As soon as the congee comes to a boil, turn the heat down to low. Simmer with the lid partially covered for at least an hour (to two hours) until the rice starts to break apart and thick. Stir occasionally so the rice does not stick to the bottom of the pot.
4. While the congee is cooking, in a small pot, fill with enough water just barely covering the shrimp shells and bring to a boil. Once it reaches a boil, lower the heat to medium and simmer for 20 minutes. It should yield approximately 1 cup of basic shrimp stock. (If you bought peeled shrimp, you can skip this part)
5. Mix shrimp, soy sauce and sesame oil in a bowl. Cover the bowl with plastic wrap and let it marinade in the fridge while the congee is simmering.
6. Once the shrimp stock has reduced to approximately a cup, strain the shrimp stock through a sieve and discard the shells.
7. Add the shrimp stock to the congee and stir. Allow the congee to continue simmering on the stove.
8. Five minutes before serving, add the marinaded shrimp and stir. Cook for 5 minutes or until the shrimp is fully cooked. Ladle and serve with soy sauce, red vinegar, preserved vegetables and century egg.
![]() |
| Drizzle some soy sauce and red vinegar. |
Common Toppings for Congee:
![]() |
| L-R: Preserved Bamboo Shoots in Chili Oil, Chili Radishes |
![]() |
| Century Egg (preserved duck egg) |
Source: Frugal Allergy Mom
Subscribe to:
Posts (Atom)
%2B3.jpg)
+1.jpg)
%2B2.jpg)
+10.jpg)
+11.jpg)
%2B4.jpg)
%2B8.jpg)
%2B5.jpg)
%2B9.jpg)